AWS S3
Connecting Kumo to your AWS S3 bucket.
Connecting Your S3 Bucket
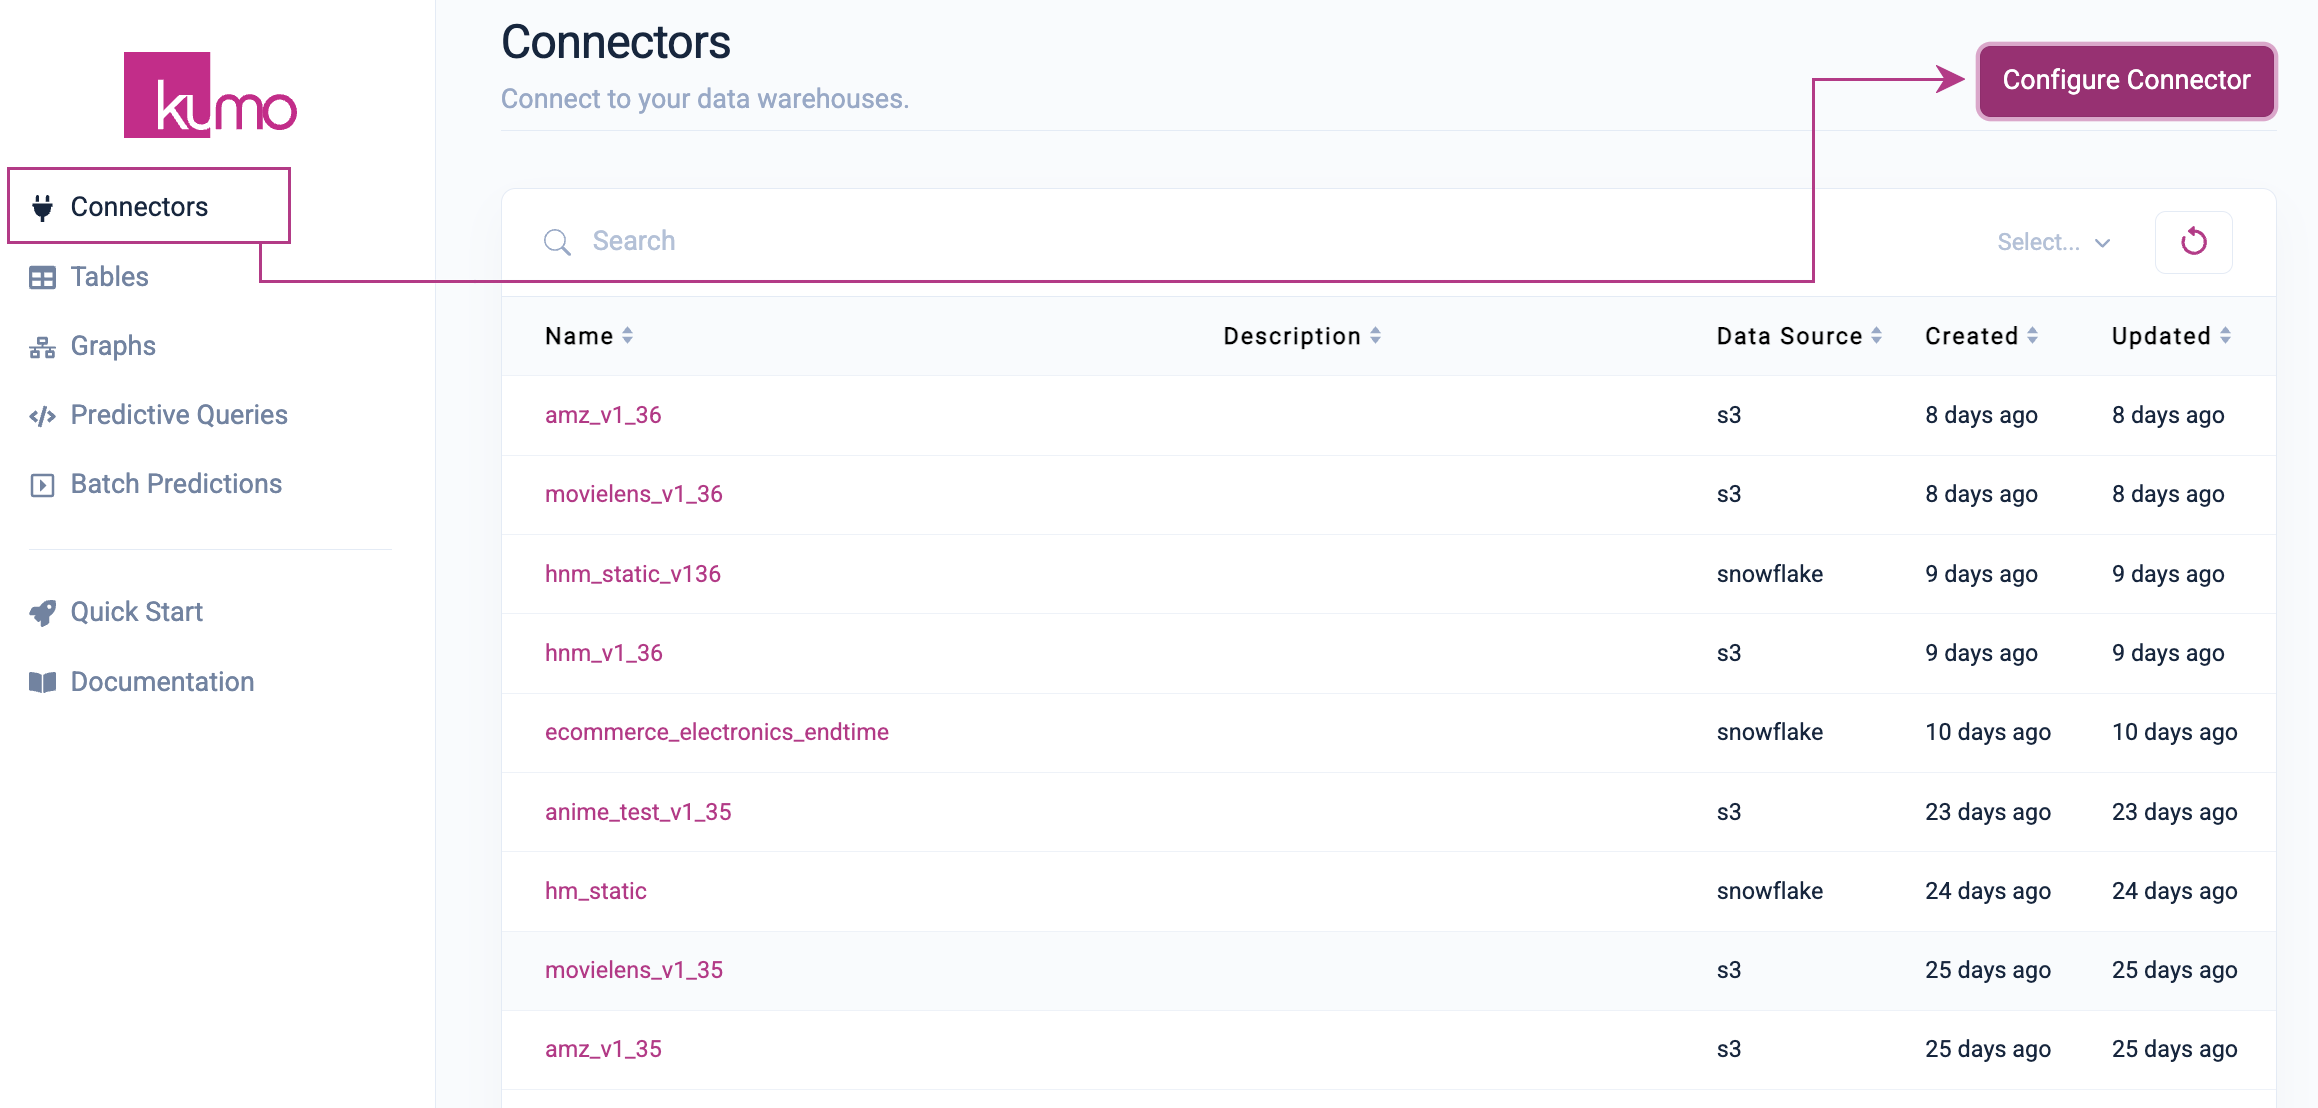
To set up a new S3 connector, click on Connectors in the left-hand column, followed by the Configure Connector button on the "Connectors" page.

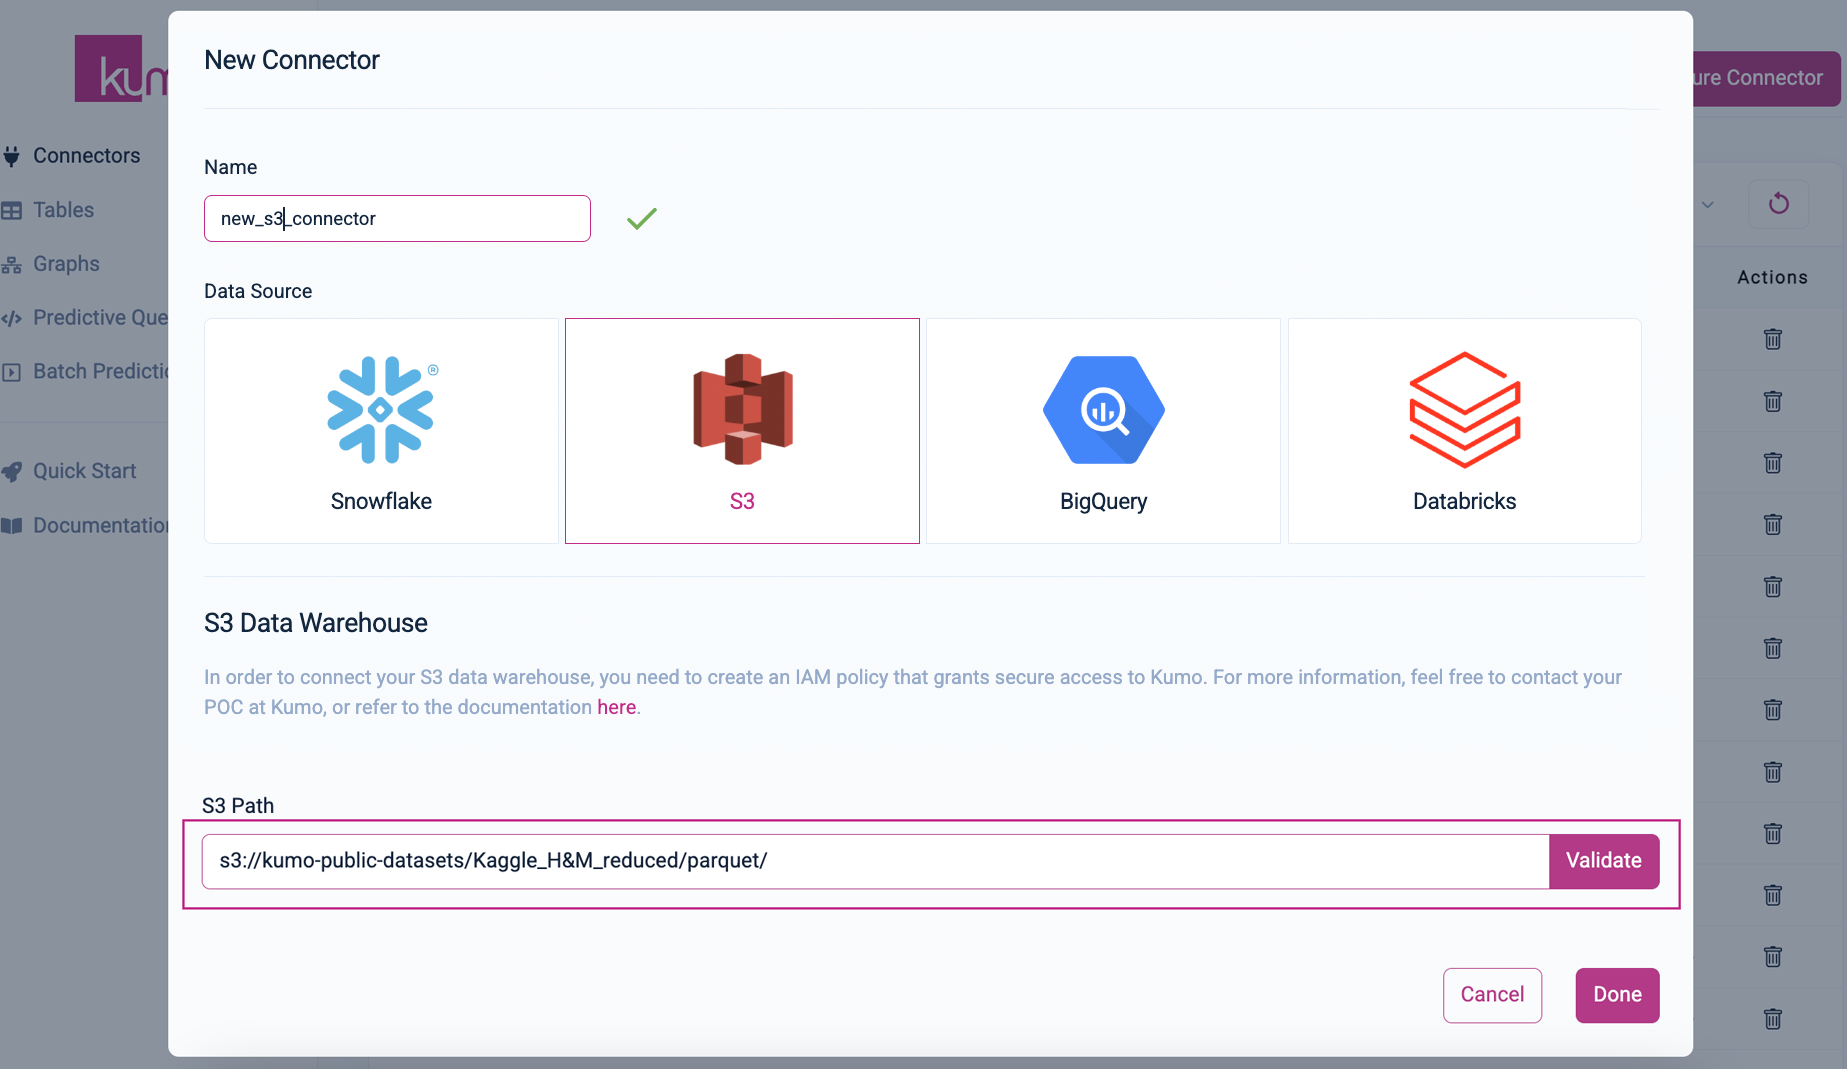
On the "New Connector" model window, provide a name for your new S3 connector and click the S3 button. The configuration settings for connecting to your S3 data warehouse will immediately appear below.
Enter the path to your S3 bucket and click the Validate button to verify that your S3 data warehouse is accessible from Kumo.

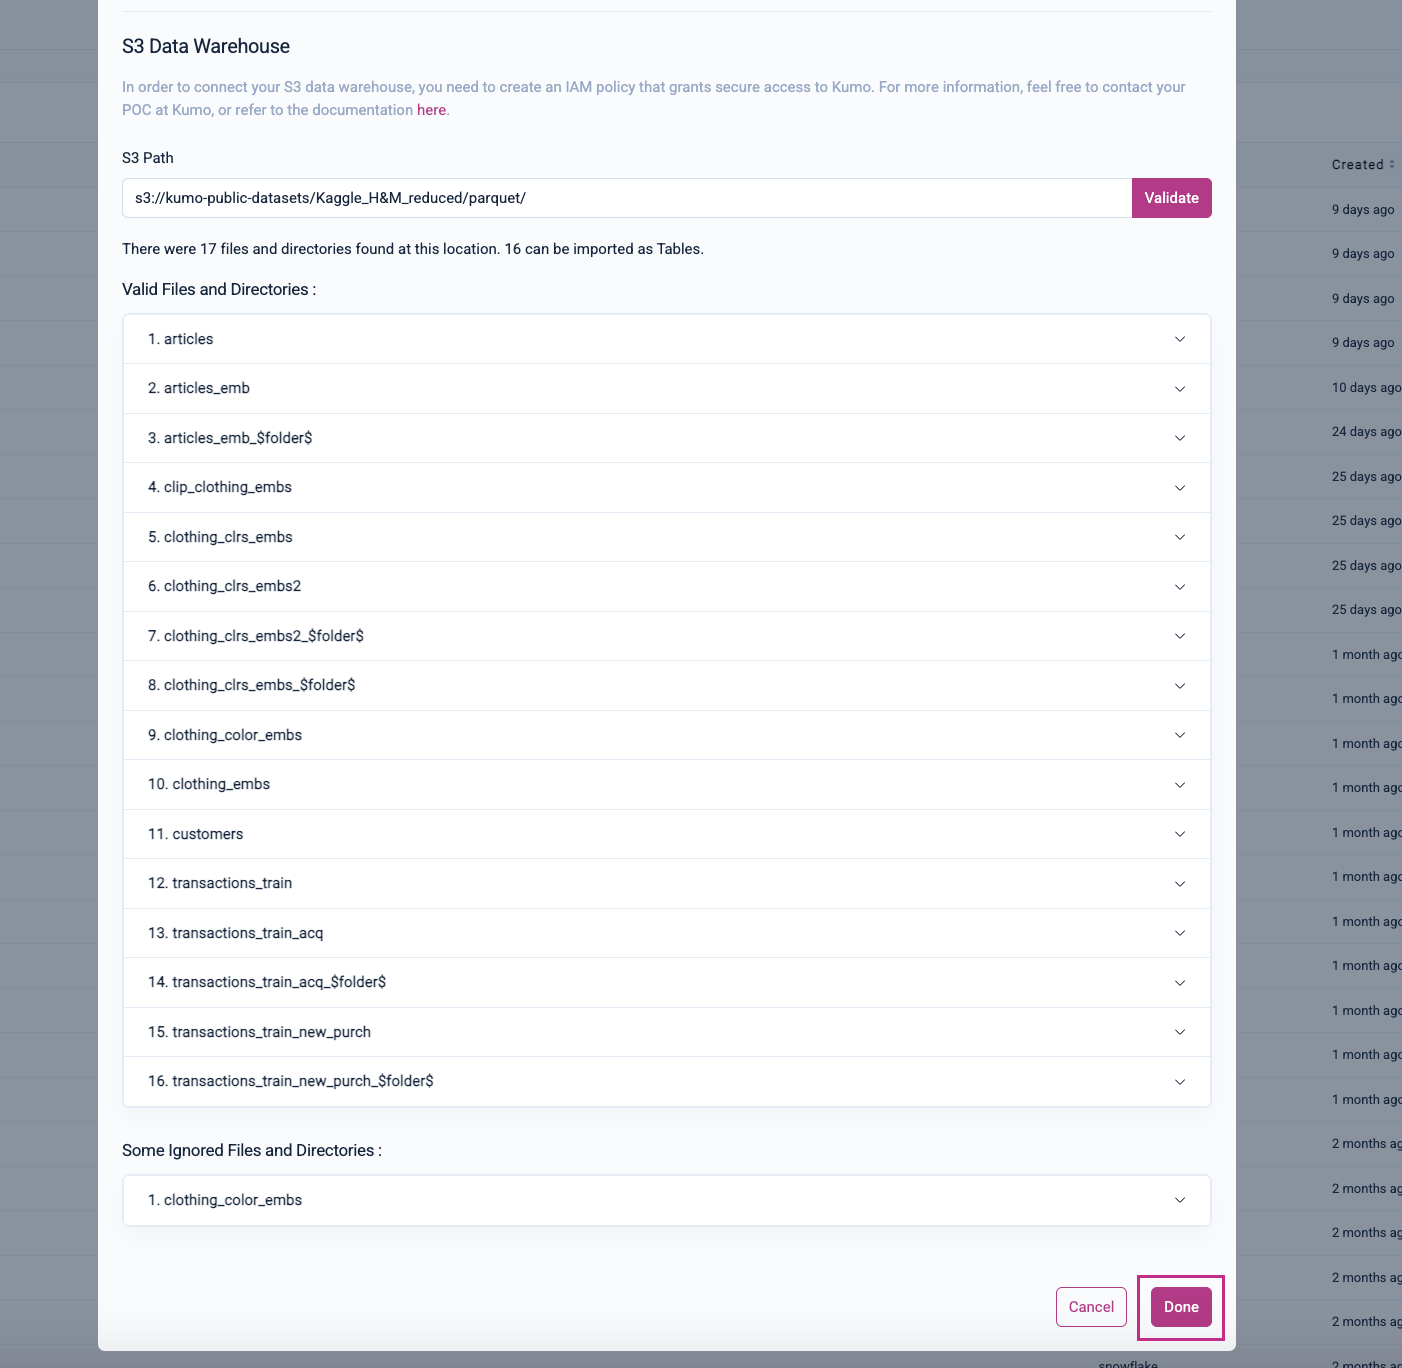
If the provided S3 path is valid and accessible, Kumo will display a list of files and directories found in the S3 bucket, as well as a list of ignored files and directories.

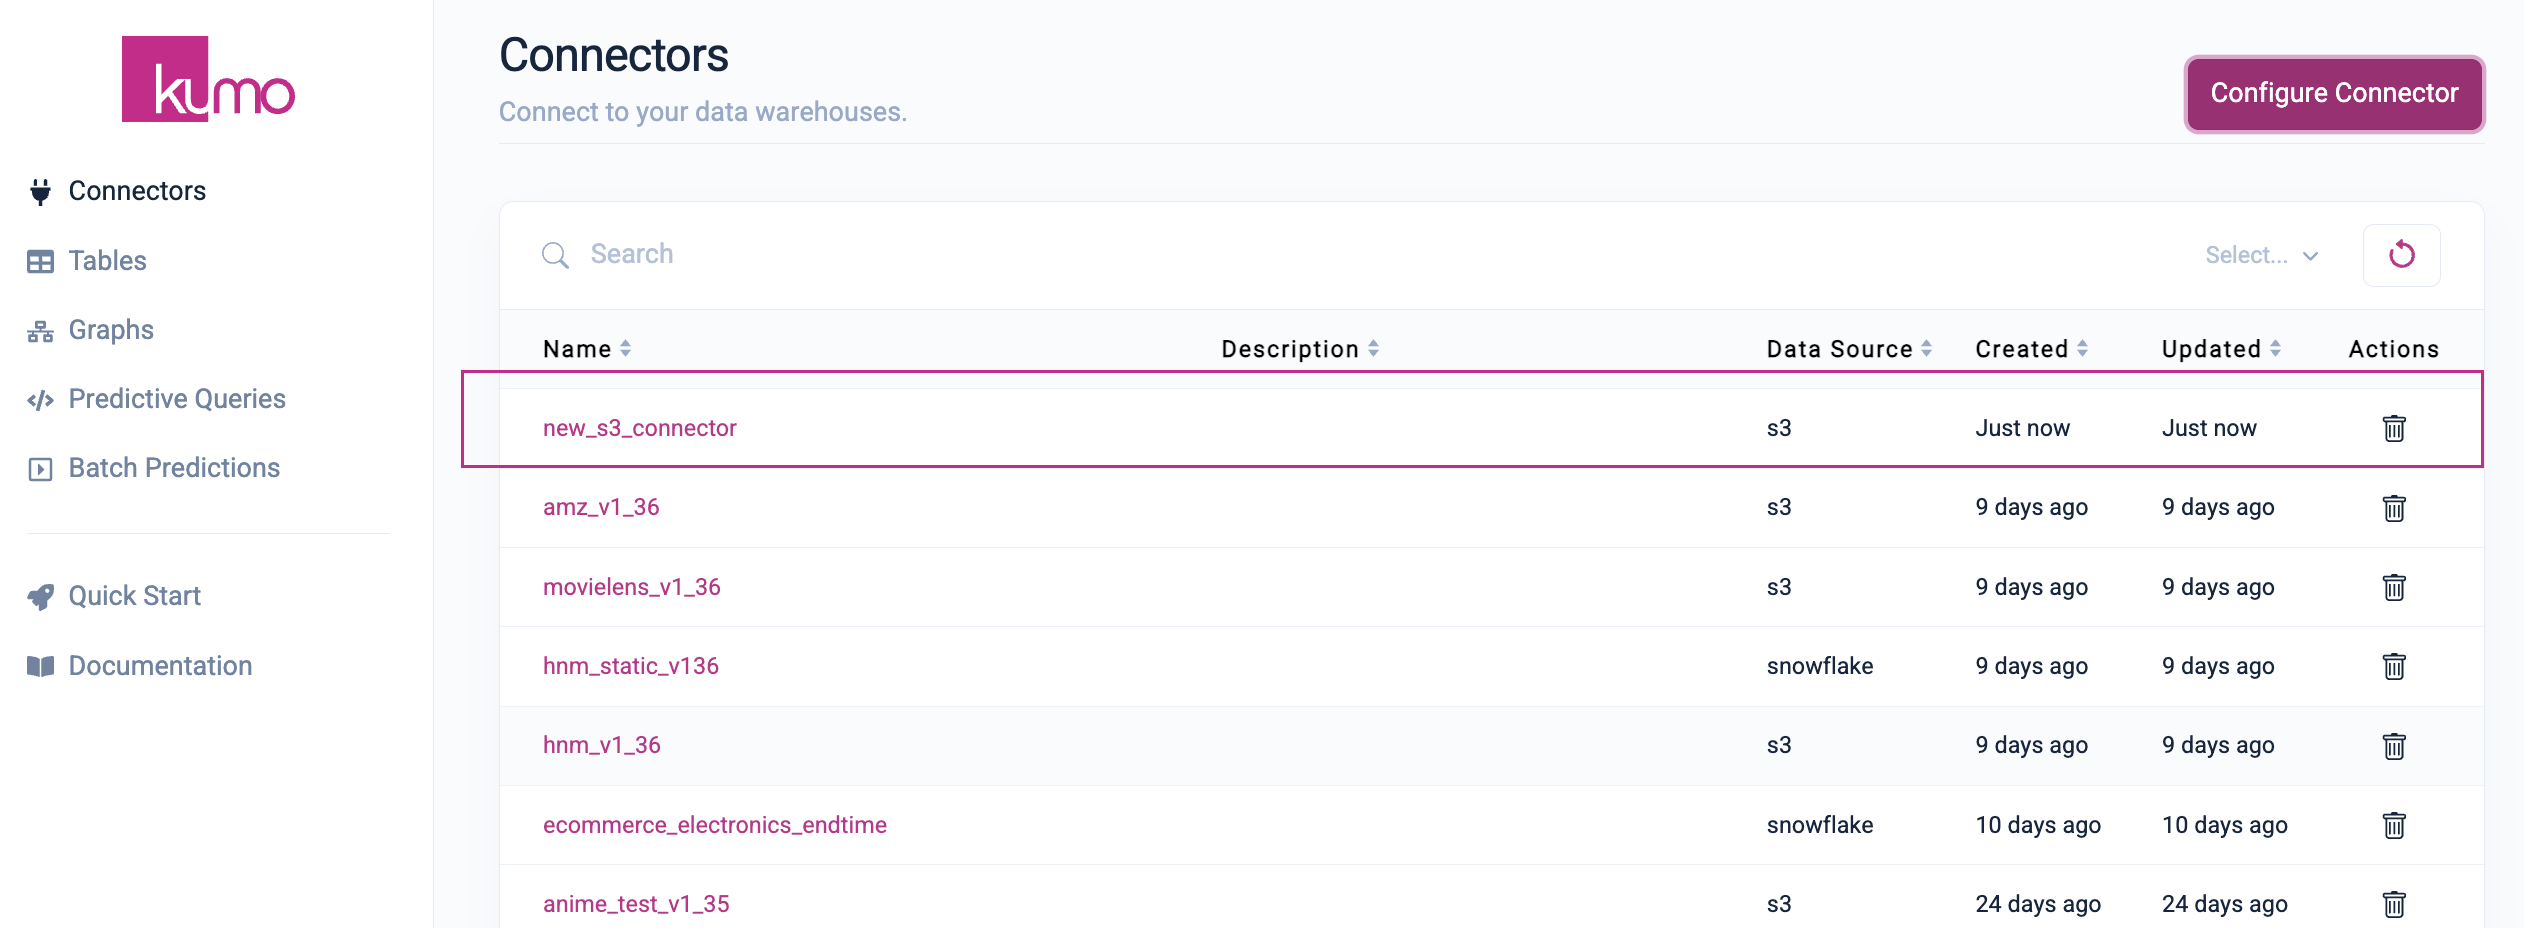
To finalize the creation of your new S3 connector, click on the Done button at the bottom of the model window. Kumo will then create your new connector and route you back to the "Connectors" page.

You can click on the name of your new connector in the "Name" column to view its details and connect your tables.
S3 File/Directory Configuration
When reading in CSV or Apache Parquet files from AWS S3, the connector is set up so that you can only read from a specific top-level directory location. The top-level directory may contain files or second-level directories. Each individual file or second-level directory in the top-level directory represents a single table that you can connect to Kumo.
Directory Configuration
If the top-level directory contains files, Kumo will ignore all second-level directories, and only allow those files to be ingested as tables.
If you are connecting second-level directories as tables, a couple of rules apply:
- All files within that directory must have the same type (either CSV or Parquet).
- All files must also share the same column schema (header, in case of CSV).
- There should only be CSV or Parquet files stored under a second-level directory, and no deeper level directories.
- The resulting table will contain all rows from all files stored under the second-level directory.
Here's an example of a second-level storage structure for reference:
|-- Root directory
  |-- Table 1
    |-- File 1 (CSV or Parquet)
    |-- File 2 (CSV or Parquet)
    |-- ...
  |-- Table 2
    |-- File 1 (CSV or Parquet)
    |-- File 2 (CSV or Parquet)
    |-- ...
  |-- ...
For optimal performance, please limit the number of tables from the root directory to 30.
Parquet Size and Data Format
When using Parquet data, you should cast Parquet columns to their proper data type (e.g., use the timestamp data type for dates), as this helps streamline the process of data ingestion and validation. Please note that Kumo currently does not support Hive partitioned tables.
For optimal performance, be sure to keep each of your Parquet files under 512MB.
CSV Size and Data Format
When using CSV data, we apply the following limitations to the dataset. Converting your dataset to Parquet is recommended whenever your dataset is large.
- There are at most 128 partitions for a CSV table.
- The data size is less than 10GB in total when all partitions are combined.
Data Sharing Steps
Once you are ready to share the data from S3, please add the below bucket policy (after updating the <data bucket name> with the actual bucket name, and {% $customerId %} with your company name) to your S3 bucket so Kumo compute instances can access the data.
{
  "Version": "2012-10-17",
  "Statement": [
    {
      "Effect": "Allow",
      "Principal": {
        "AWS": "arn:aws:iam::926922431314:role/kumo-{% $customerId %}-external-shared-iam-role"
        },
      "Action": [
        "s3:GetObject",
        "s3:PutObject",
        "s3:ListBucket",
      ],
      "Resource": [
        "arn:aws:s3:::<data bucket name>/*",
        "arn:aws:s3:::<data bucket name>"
      ]
    }
  ]
}
For more in-depth guidance on how to attach a policy to a bucket, please refer to AWS' Add Bucket Policy guide, or contact your Kumo Success Manager for assistance.
Once you apply the policy, please share the policy text with your contact at Kumo (e.g., over Slack, email), as they will need to apply a similar policy to Kumo's AWS account.
Data Sharing Steps - Updating KMS Key Policy
To allow an External IAM role from an external account to access an S3 bucket that's encrypted with a KMS key in a different account, you need to update the KMS key policy:
- Locate the KMS Key Policy attached to the s3 bucket in the account where the KMS key is defined.
- Append the following statement to the existing KMS Key Policy to grant access to the kumo-{% $customerId %}-external-shared-iam-role.
Important: Do not remove existing access permissions for the account root. Doing so may result in the loss of administrative access to the KMS key.
{
  "Version": "2012-10-17",
  "Statement": [
    {
      "Sid": "AllowExternalRoleToUseKey",
      "Effect": "Allow",
      "Principal": {
       "AWS": "arn:aws:iam::926922431314:role/kumo-{% $customerId %}-external-shared-iam-role"
      },
      "Action": [
        "kms:Decrypt",
        "kms:GenerateDataKey"
      ],
      "Resource": "*"
    }
For more in-depth guidance on how to update the KMS Key policy for the KMS Key attached to a bucket, please refer to AWS' Add KMS Key Policy for S3 Bucket guide, or contact your Kumo Success Manager for assistance.
After applying the policy, please share the KMS Key ARN with your contact at Kumo (e.g., via Slack or email). They will use it to apply a corresponding policy update to Kumo’s AWS account role: kumo-{% $customerId %}-external-shared-iam-role.
Updated 3 months ago
