Google Cloud BigQuery
Prerequisites
To set up your Google Cloud BigQuery connector, you will need to provide your Project Name, Dataset Name (if restricting to a dataset), as well as JSON credentials for accessing your data warehouse.
These steps assume you've already created a Service Account and Service Account Key in Google. If you have not done so already, create a Service Account and Service Account Key by following these directions:
Once you have completed these steps, save your project ID and JSON values in safe location—you will need them later in the setup process.
In order for us to operate on BigQuery, we need basic read access such as:
- roles/bigquery.dataViewer
- roles/bigquery.filteredDataViewer
- roles/bigquery.metadataViewer
- roles/bigquery.readSessionUser
- roles/bigquery.user
Later when we export output to bigquery, we will need permission:
- roles/bigquery.dataEditor
Setting Up Your BigQuery Connector
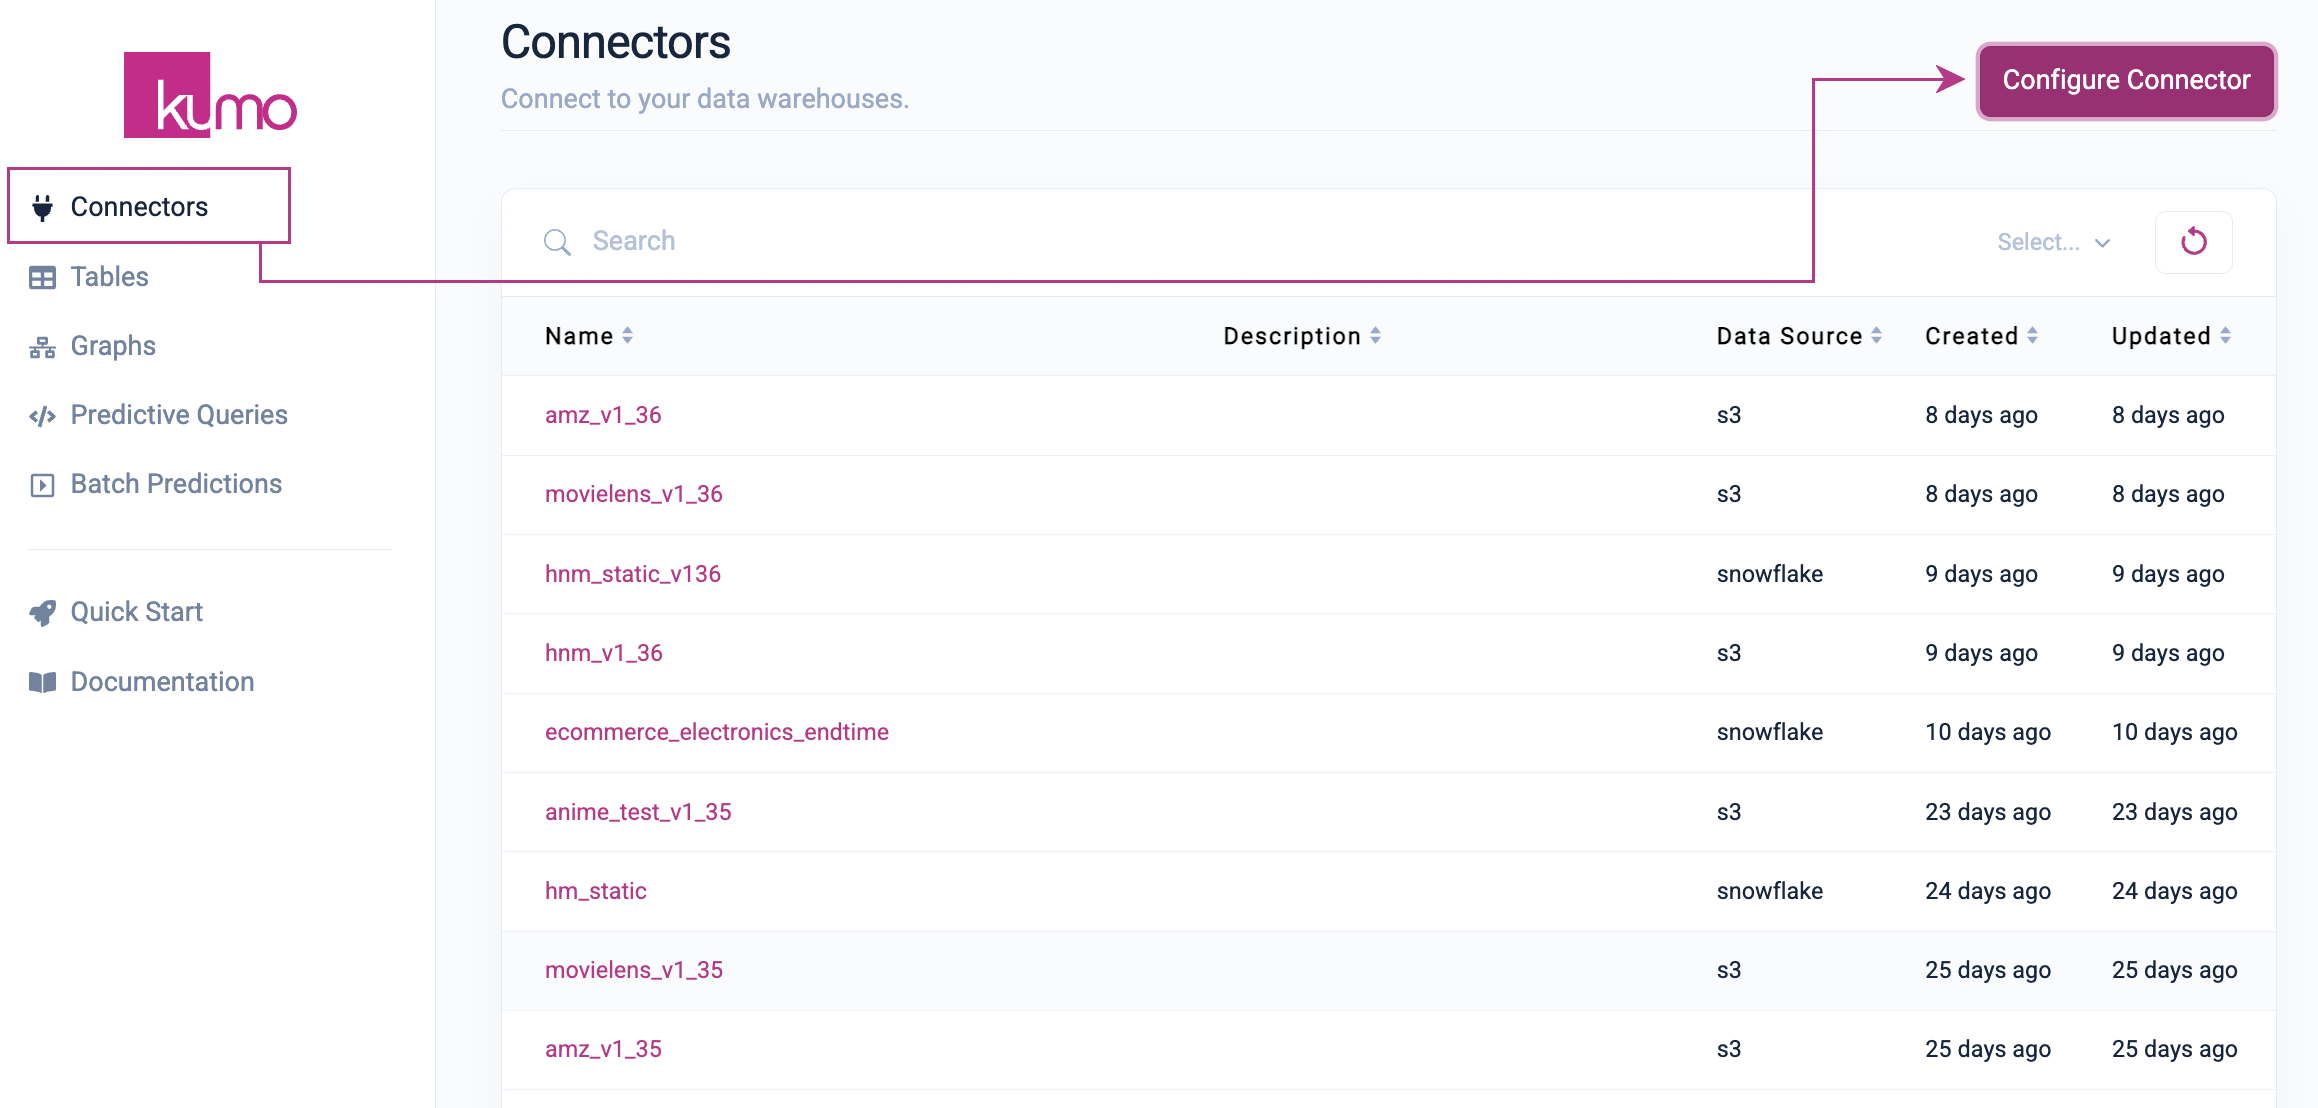
Click on Connectors in the left-hand column, followed by the Configure Connector button on the "Connectors" page.
In the "New Connector" modal window, provide a name for your new BigQuery connector and click the BigQuery button. The configuration settings for connecting to your BigQuery data warehouse will immediately appear below.
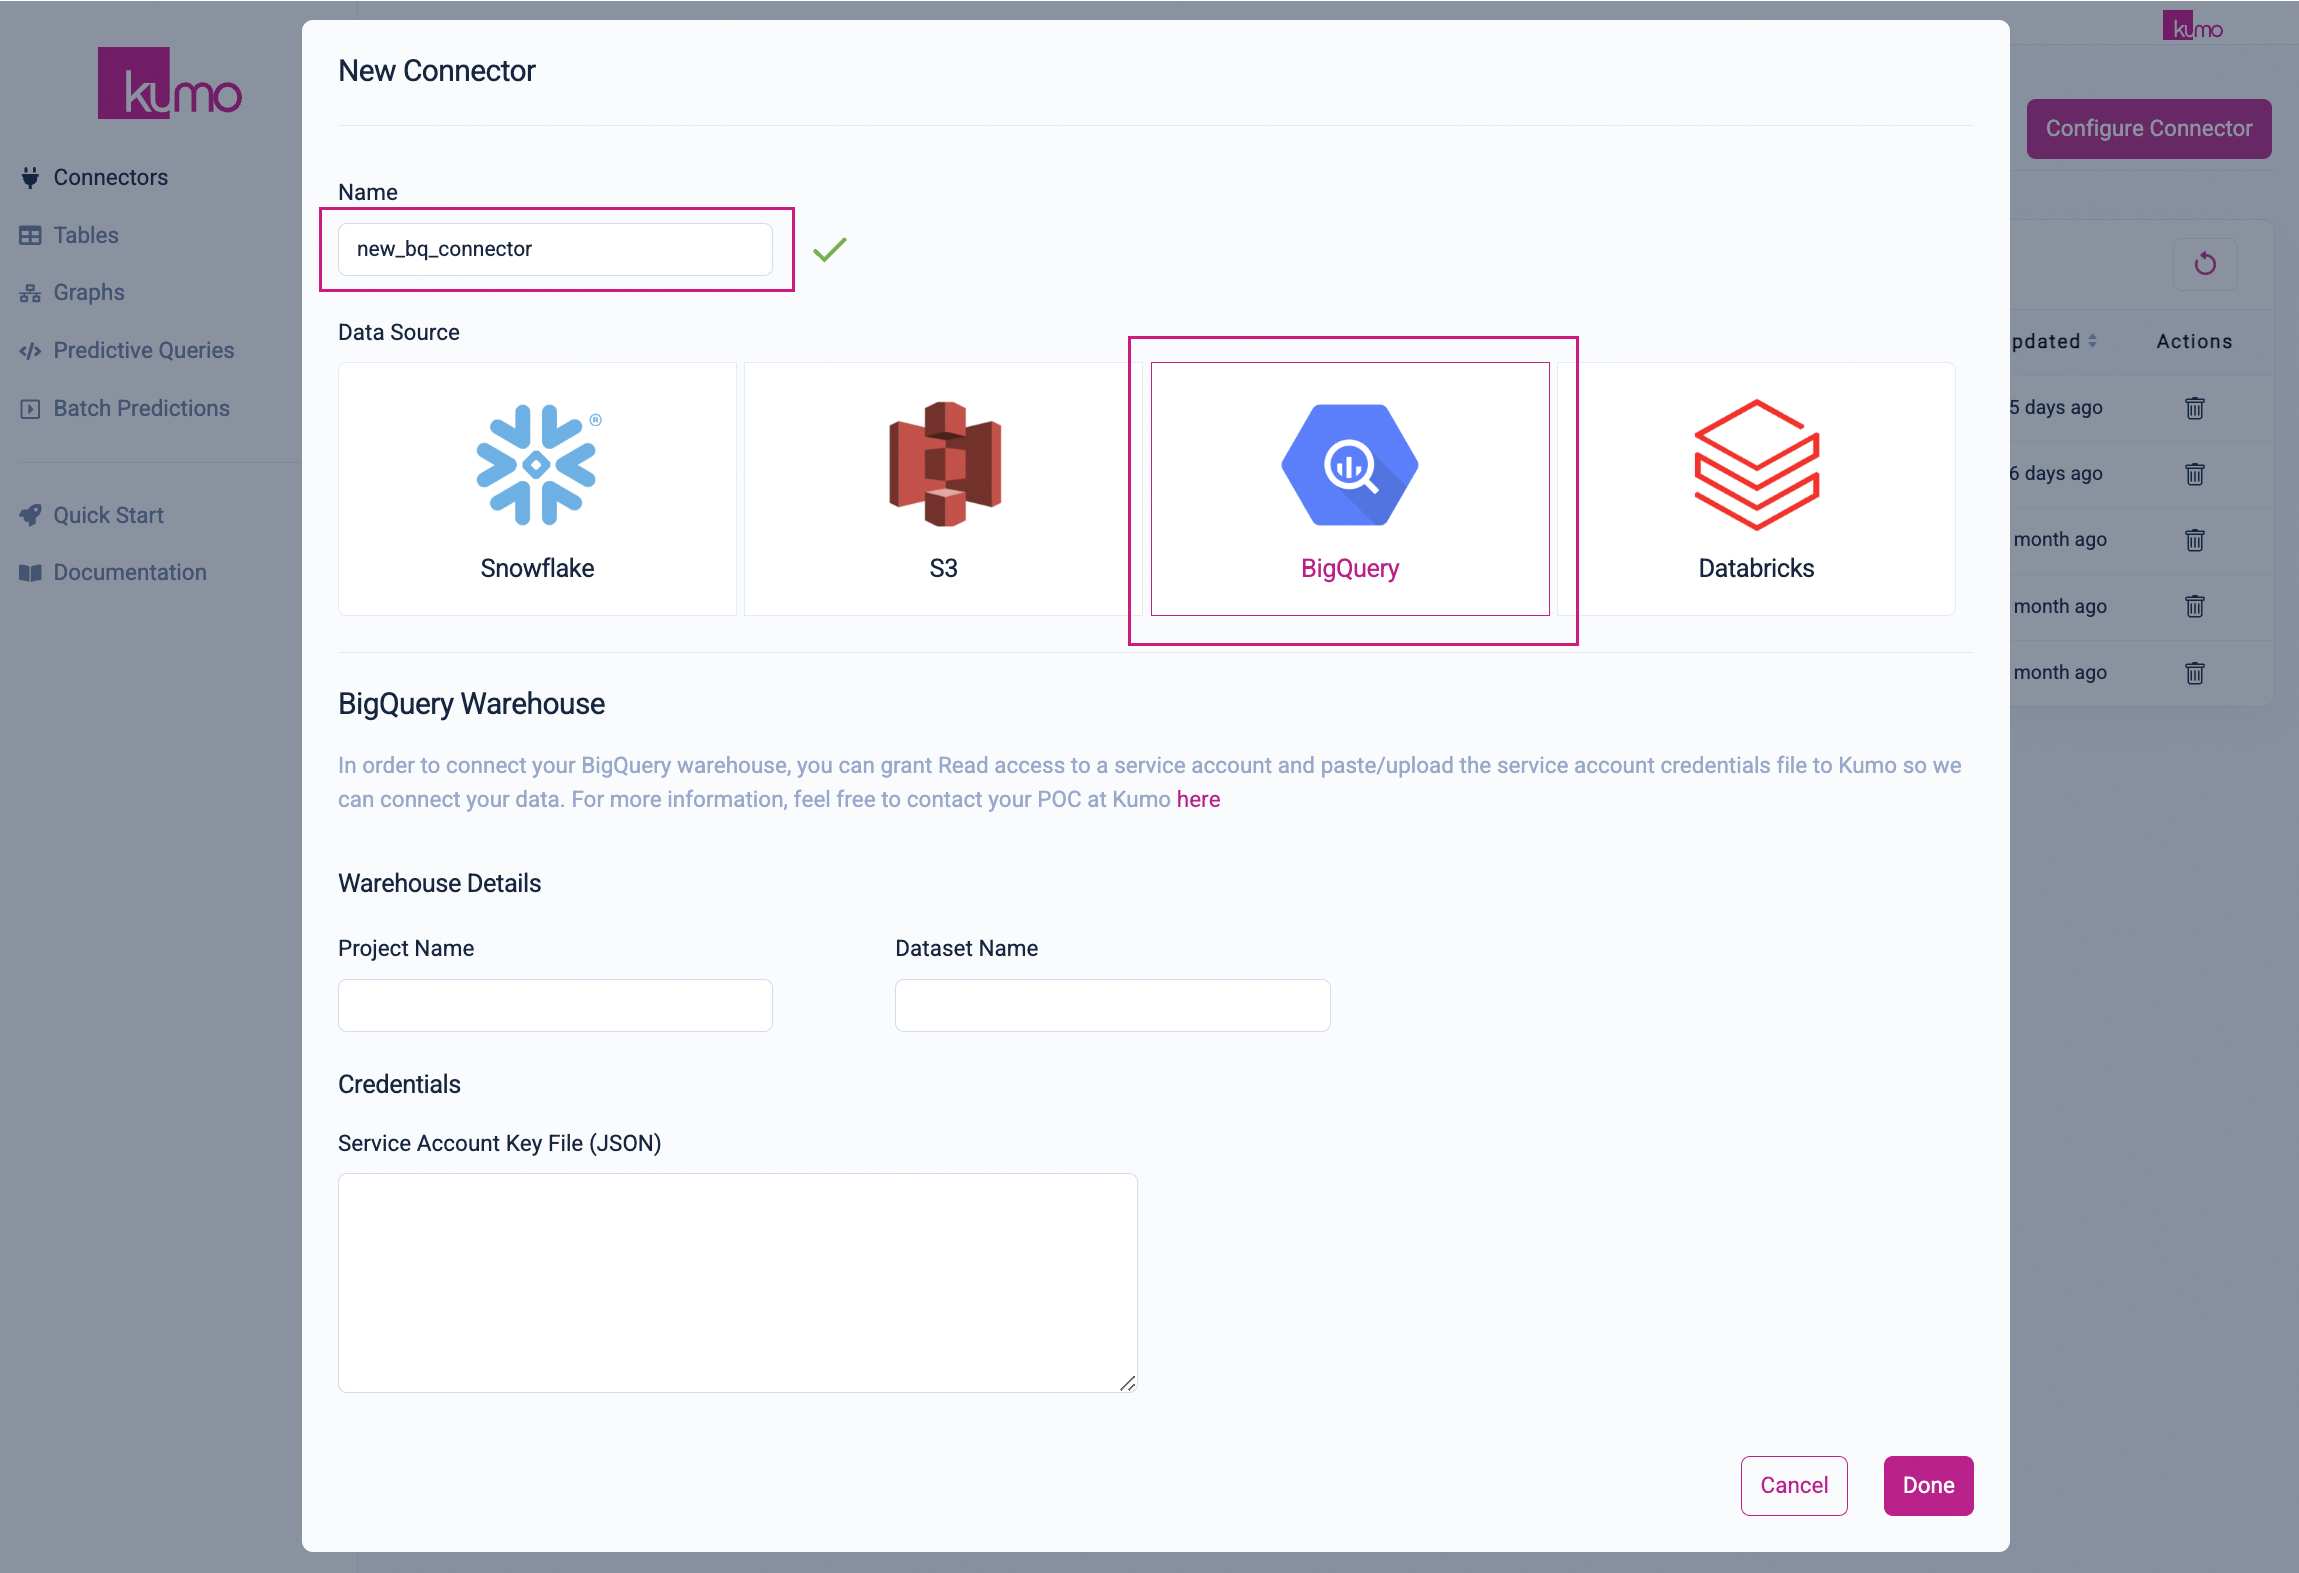
BigQuery Connection Details
Under the BigQuery Warehouse section, you'll need to insert your data warehouse details:
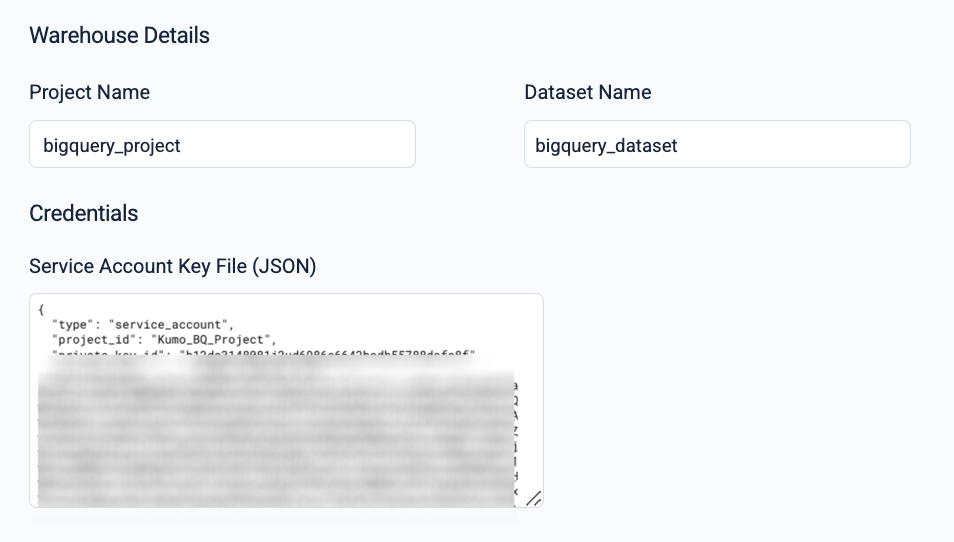
- Project Name: to share all datasets in your Google Cloud BigQuery data warehouse.
- Dataset Name (optional): if you only want to connect to specific dataset tables.
- Service Account Key File (JSON): your Google Cloud BigQuery service account JSON key.
Your input should resemble the following:
Click the DONE button in the top right-hand corner. Kumo will then set up your new connector and route you back to the "Connectors" page.
Verifying Your New BigQuery Connector
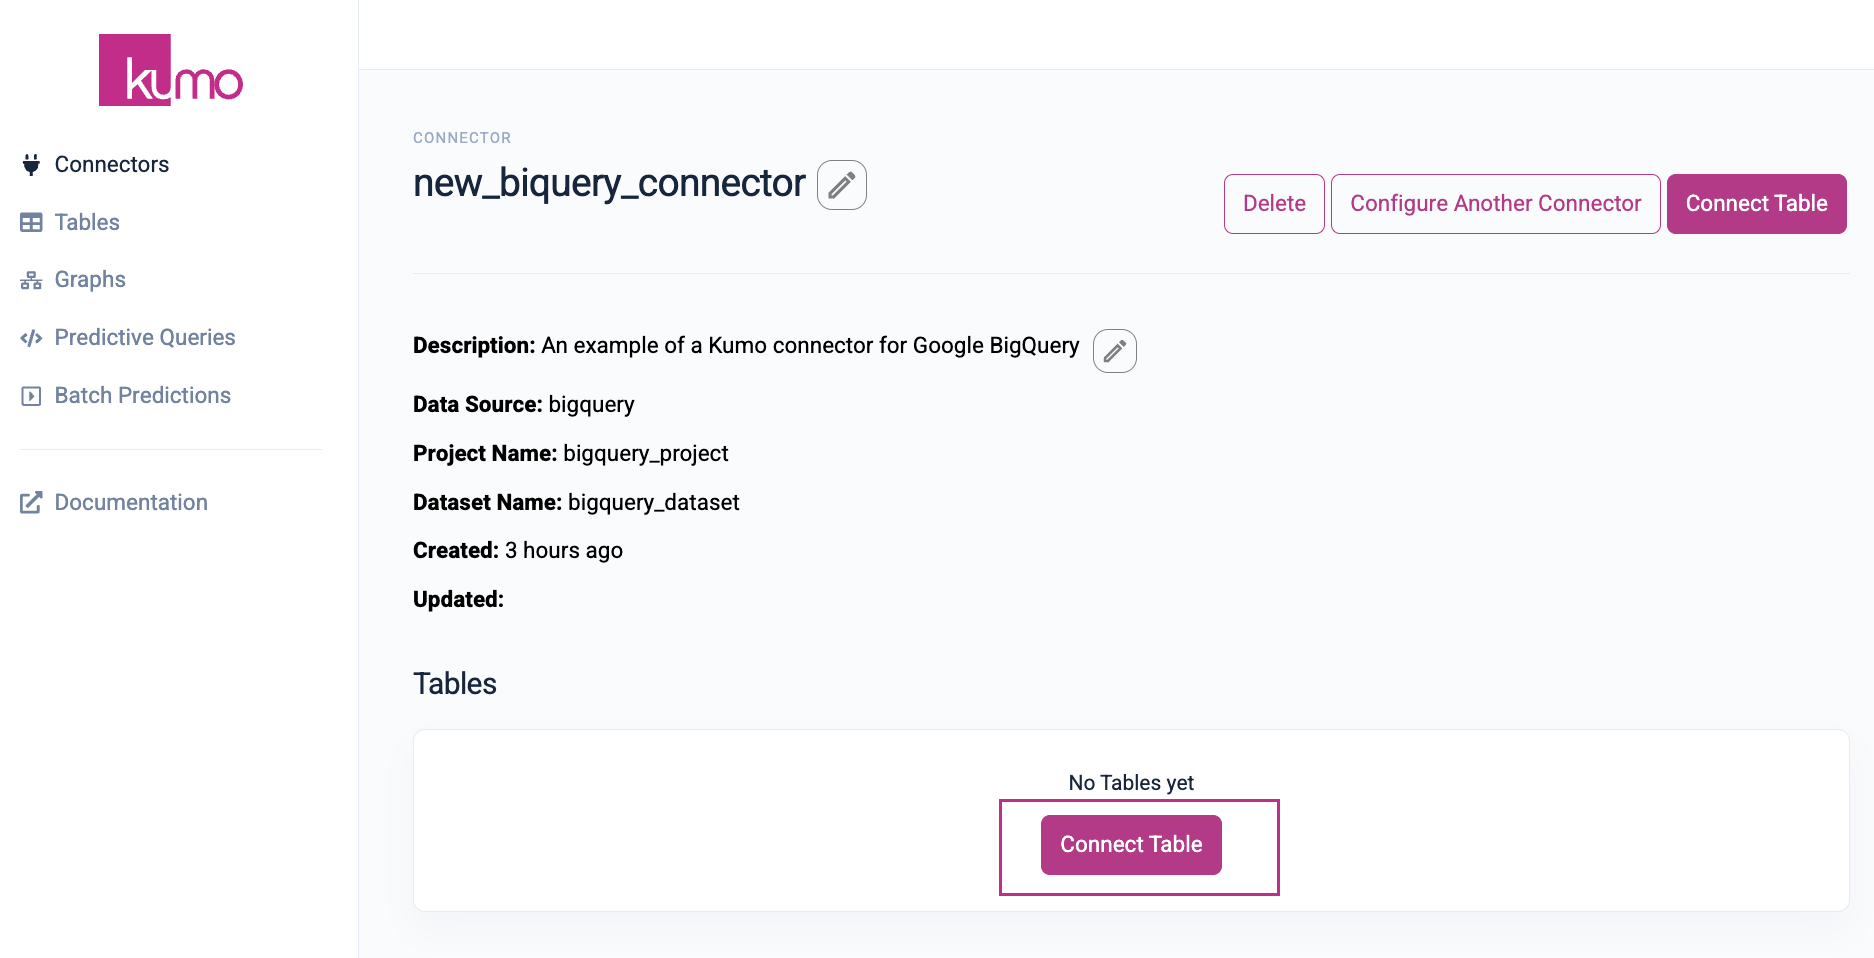
To verify that your new BigQuery connector is working, click on its name in the "Name" column of the "Connectors" page to view its detail page.

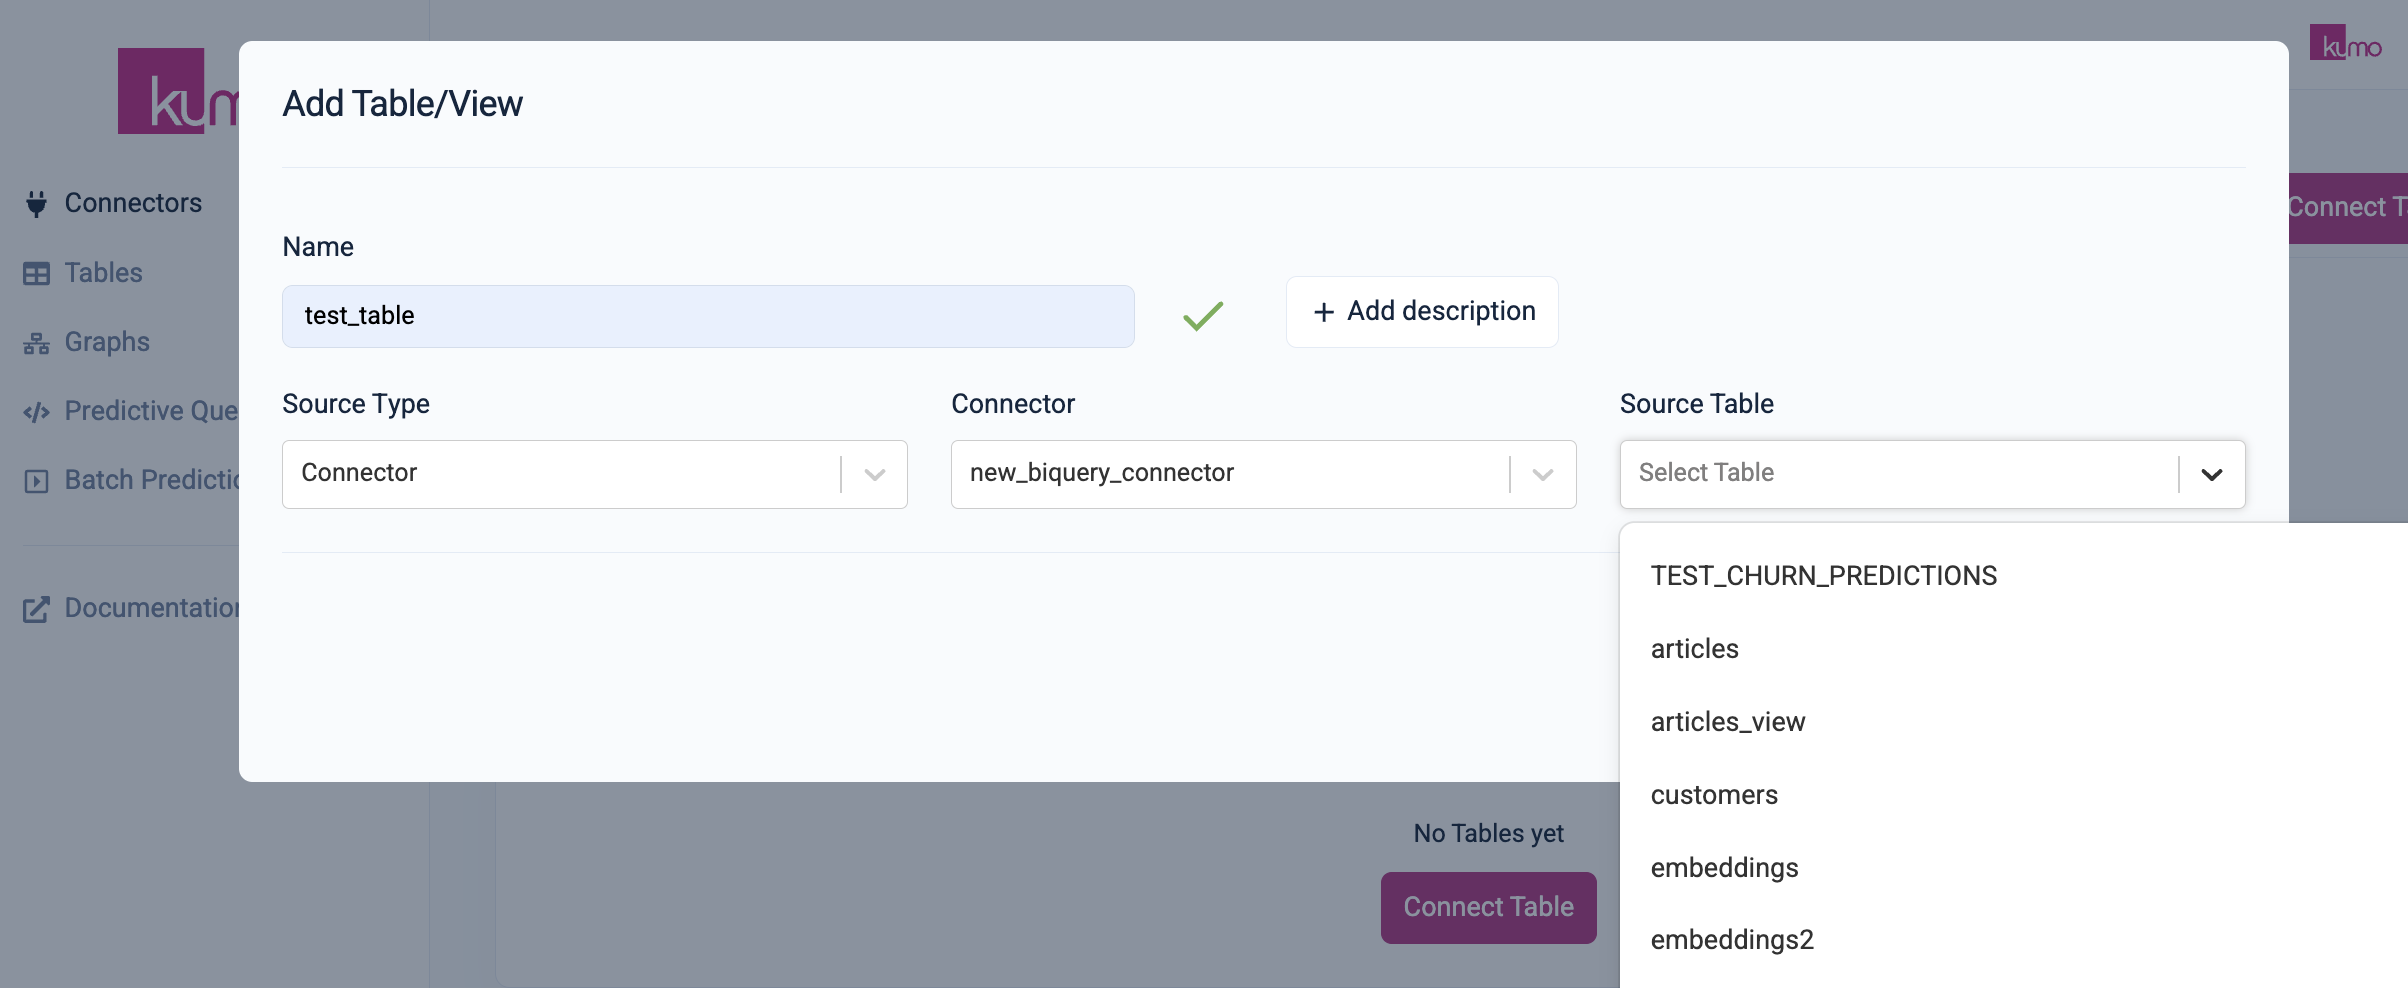
Click on the Connect Table button—the "Add Table/View" modal window should appear.
If you click the "Source Table" drop-down, you should see a list of available source tables to add.
Now that you've verified the new connector is working, you can start connecting your Kumo tables!
Updated 3 months ago
