SSO Configuration Guide
Setting up advanced session and user authentication mechanisms
Kumo is using Auth0 to support a variety of secure single-sign-on mechanisms, in order to simplify user management for your team. The two easiest integrations are:
- Google Workplace Single Sign On
- OIDC - OpenID Connect - supporting many other services including Okta and Azure Active Directory
In order to enable Google Workplace Single Sign On for your environment -- no work is needed on your end. Simply reach out to your Kumo POC (Point Of Contact), and it can be enabled within hours.
The remainder of this document describes the process to set up OIDC. For the purpose of illustration, Okta is used as the OIDC provider, but these instructions should work with any other OIDC-compliant auth provider.
Okta Configuration
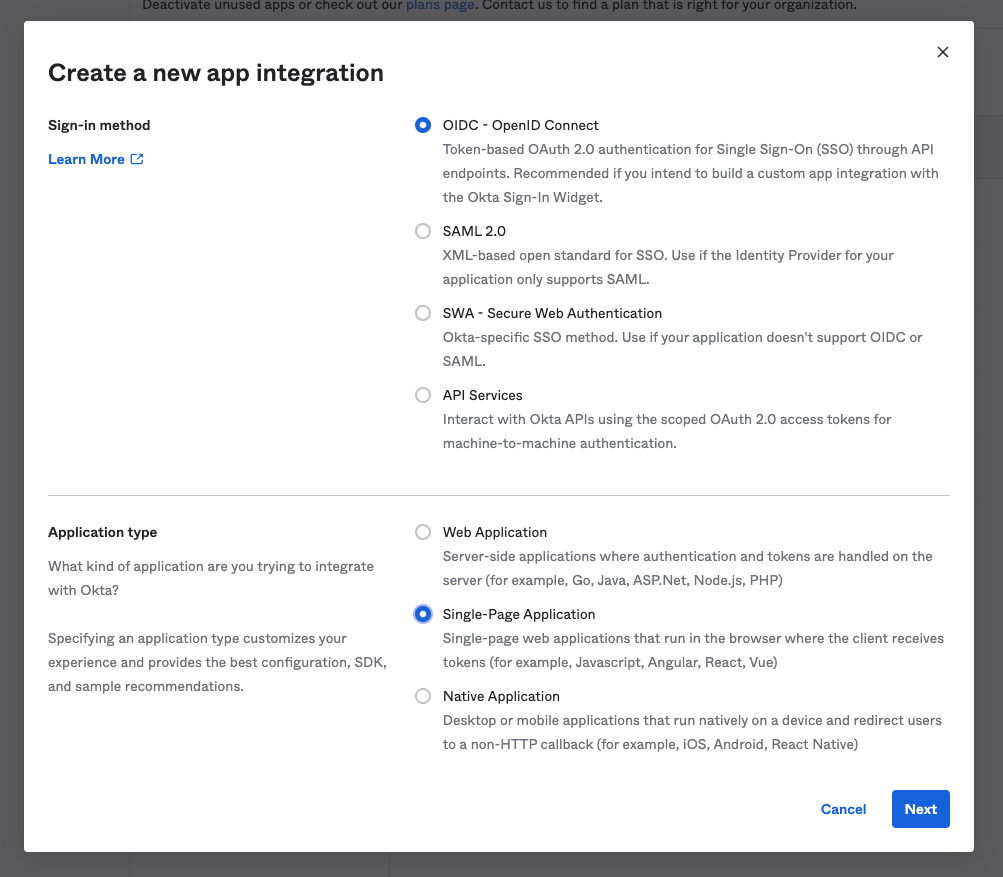
- Go to your Applications and create a new Application with the following settings:
- Sign-in method: OIDC - OpenID Connect
- Application type: Single-Page Application
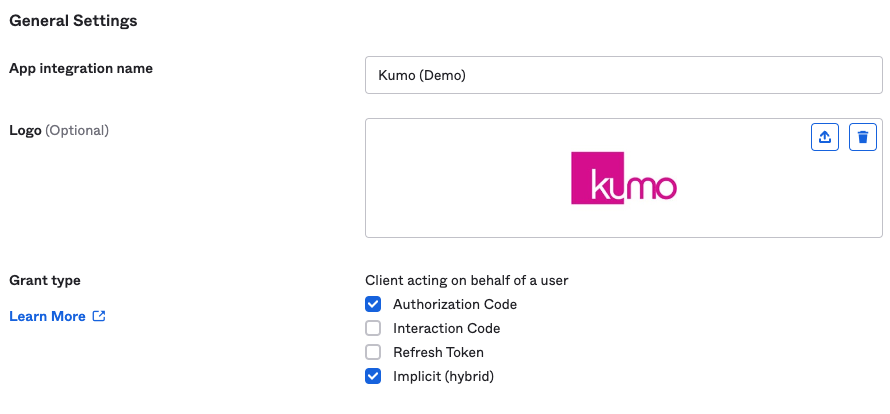
- Under General Settings, make sure to select Grant types of Authorization Code and Implicit (Hybrid)
- Next, add the following sign-in and sign-out URLs
- Sign In:
https://auth.kumoai.cloud/login/callback - Sign Out:
https://auth.kumoai.cloud/logout
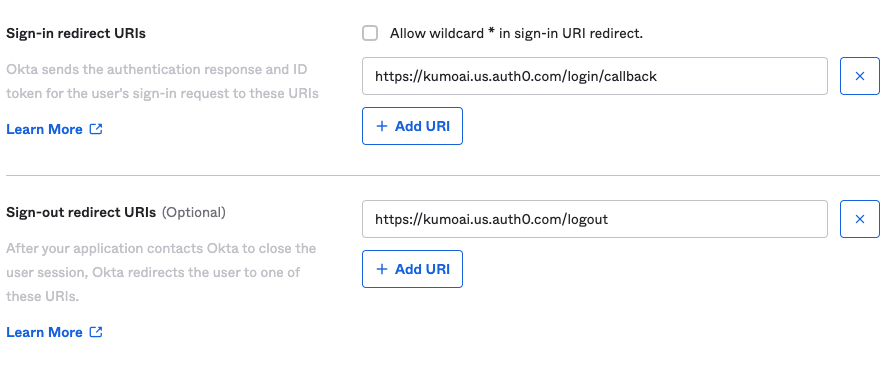
NOTE: Please useauth.kumoai.cloud instead of kumoai.us.auth0.com as shown in the image above
- Select your preferred Assignment policy

-
Click Save to create the App!
-
Copy the Client ID and your Okta base URL
- Example Client ID:
0oa654ok0jBdIJrpT5d7 - Example Okta URL:
dev-22499602.okta.com
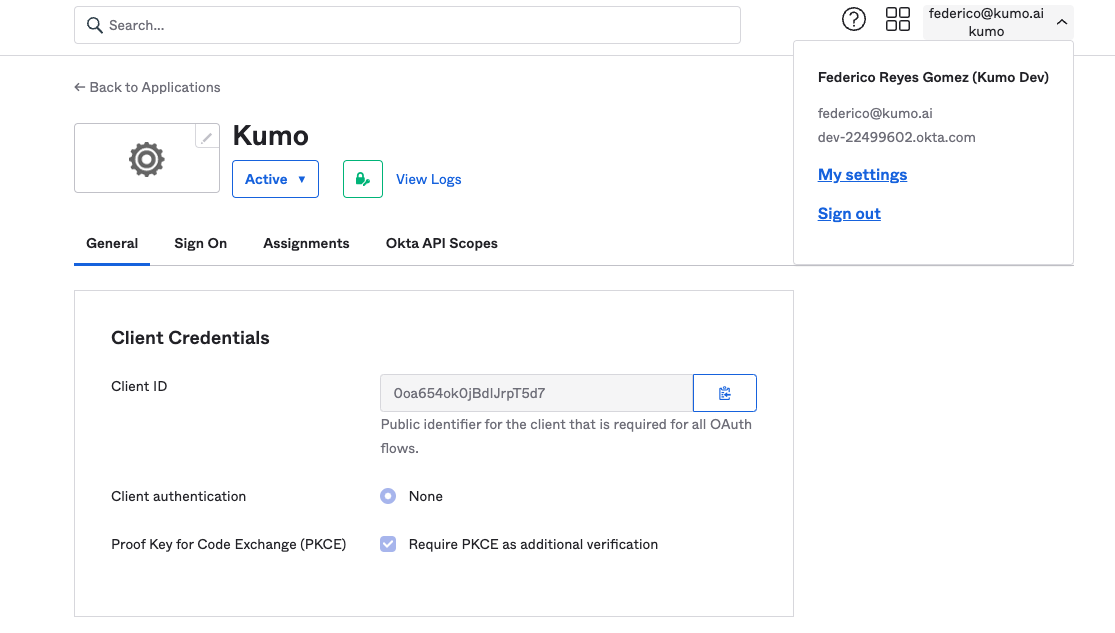
- Send your Client ID and Okta Base URL to the Kumo team
You will receive a notification from Kumo when your SSO onboarding is complete.
Updated 2 months ago