Snowflake Native App Connector
Kumo connects to your Snowflake data warehouse using a Snowflake Connector. Creating a Snowflake connector in Kumo requires the following steps:
Step 1: Grant the privileges required
The following is the minimum set of privileges that should be granted to the Kumo Snowflake app to successfully create a Snowflake connector.
Note
- The following commands should be run by a user who has
OWNERSHIPorWITH GRANT OPTIONprivileges on the objects (warehouse, database, schema and tables) being granted access to. - The objects used in the commands (warehouse, database, and schema) must be the same as those used to create the connector (in Step 2 below).
- See Warehouse sizing table below for the size of the warehouse to use.
-- In the following, replace KUMOAPP_NAME, DB_NAME, SCHEMA_NAME and WAREHOUSE_NAME with
-- those that will be used to build models with Kumo.

SET KUMOAPP_NAME='KUMO';
SET DB_NAME='<DB_NAME>';
SET SCHEMA_NAME='<DB_NAME>.<SCHEMA>';
SET WAREHOUSE_NAME='<WAREHOUSE_NAME>';

GRANT USAGE ON WAREHOUSE IDENTIFIER($WAREHOUSE_NAME) TO APPLICATION IDENTIFIER($KUMOAPP_NAME);

GRANT USAGE ON DATABASE IDENTIFIER($DB_NAME) TO APPLICATION IDENTIFIER($KUMOAPP_NAME);
GRANT USAGE ON SCHEMA IDENTIFIER($SCHEMA_NAME) TO APPLICATION IDENTIFIER($KUMOAPP_NAME);
GRANT SELECT, REFERENCES ON ALL TABLES IN SCHEMA IDENTIFIER($SCHEMA_NAME) TO APPLICATION IDENTIFIER($KUMOAPP_NAME);
GRANT SELECT, REFERENCES ON ALL VIEWS IN SCHEMA IDENTIFIER($SCHEMA_NAME) TO APPLICATION IDENTIFIER($KUMOAPP_NAME);
GRANT SELECT, REFERENCES ON ALL MATERIALIZED VIEWS IN SCHEMA IDENTIFIER($SCHEMA_NAME) TO APPLICATION IDENTIFIER($KUMOAPP_NAME);
GRANT CREATE TABLE ON SCHEMA IDENTIFIER($SCHEMA_NAME) TO APPLICATION IDENTIFIER($KUMOAPP_NAME);
Step 2: Creating the Snowflake connector
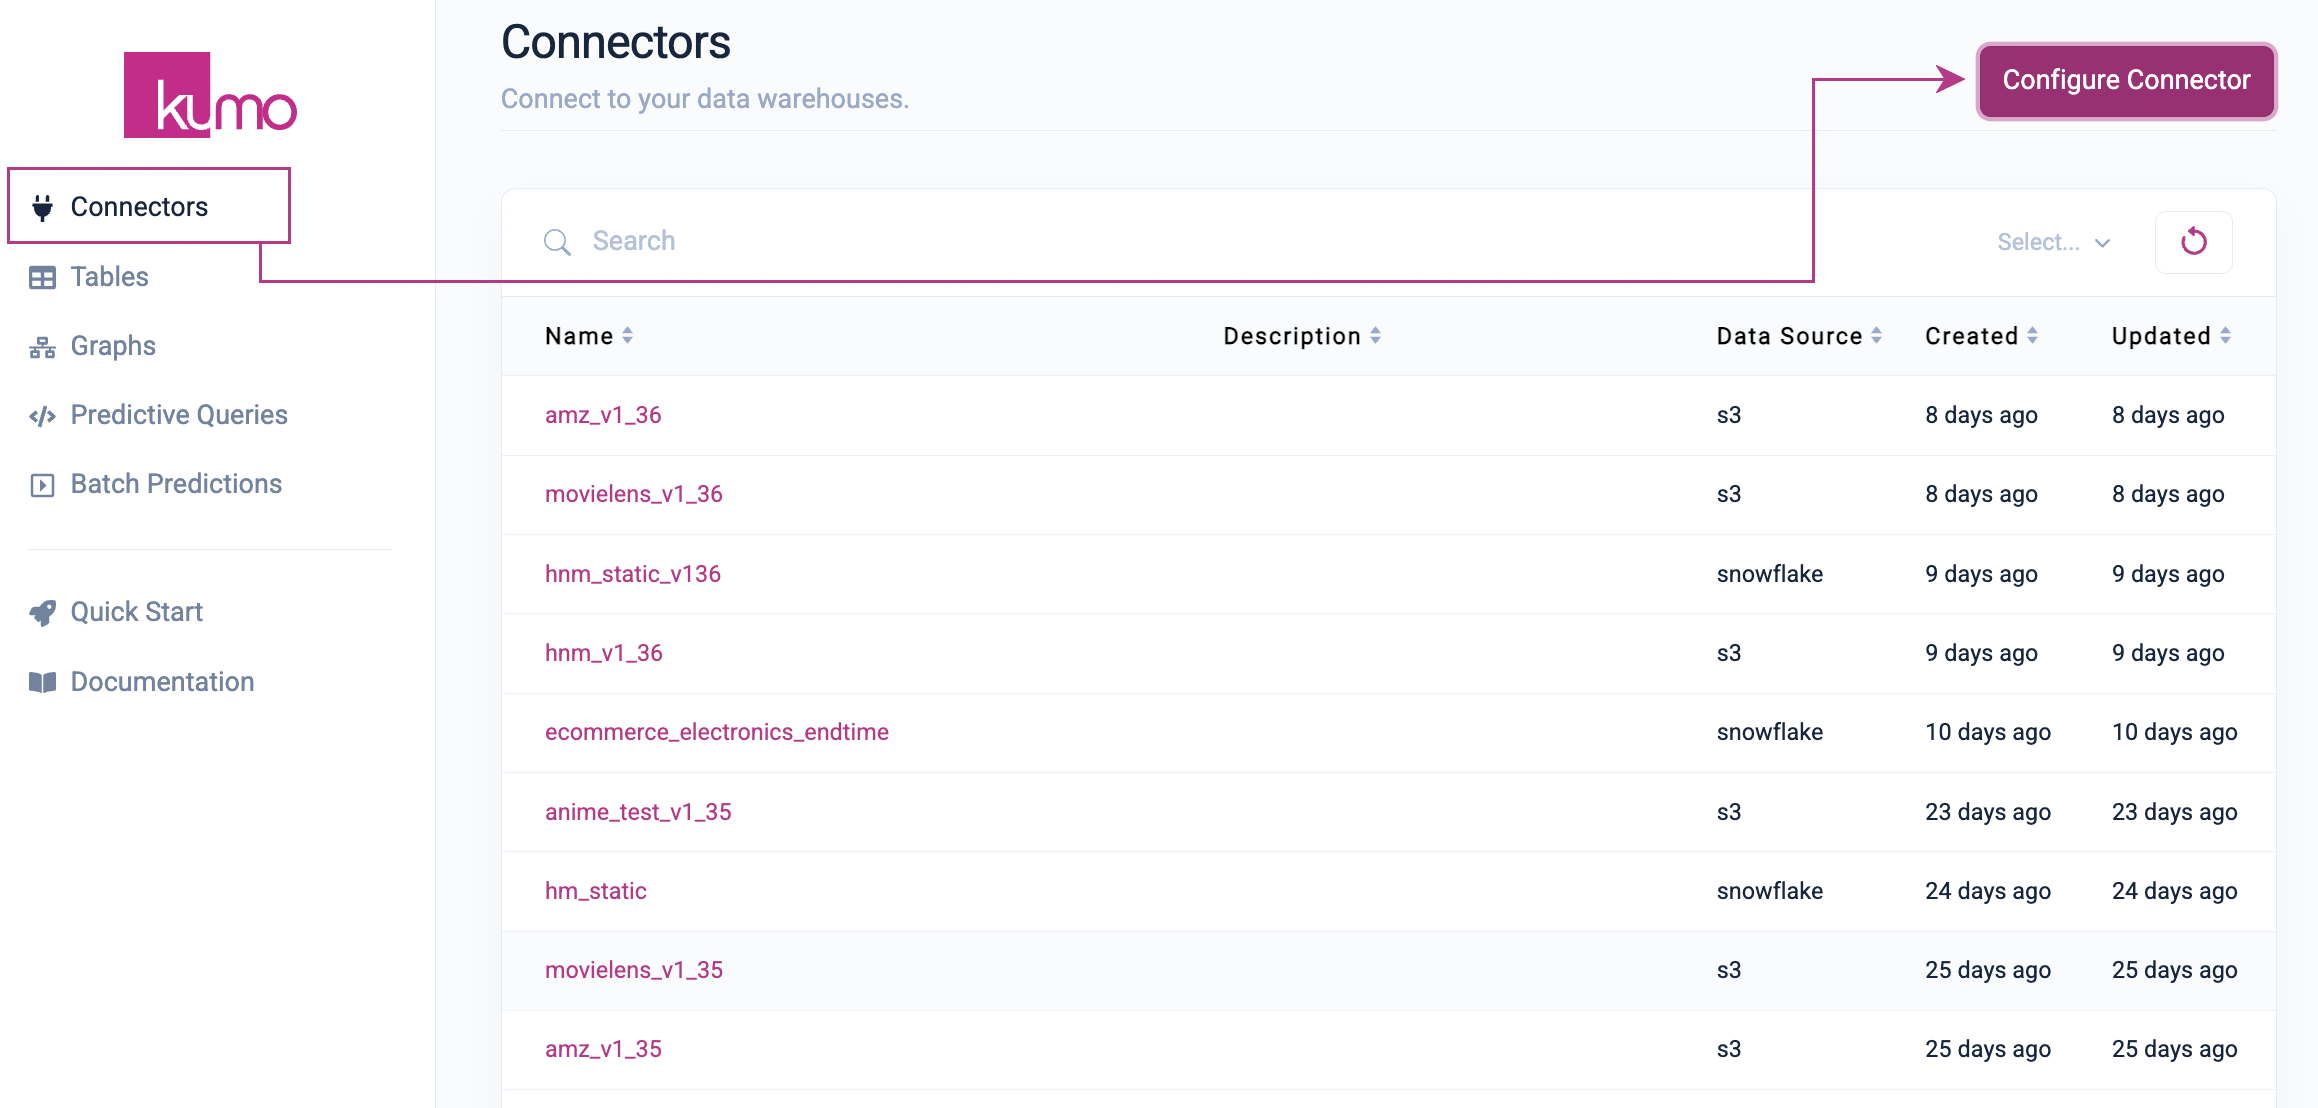
- To set up a new Snowflake connector, click on Connectors in the left-hand column, followed by the Configure Connector button on the "Connectors" page.

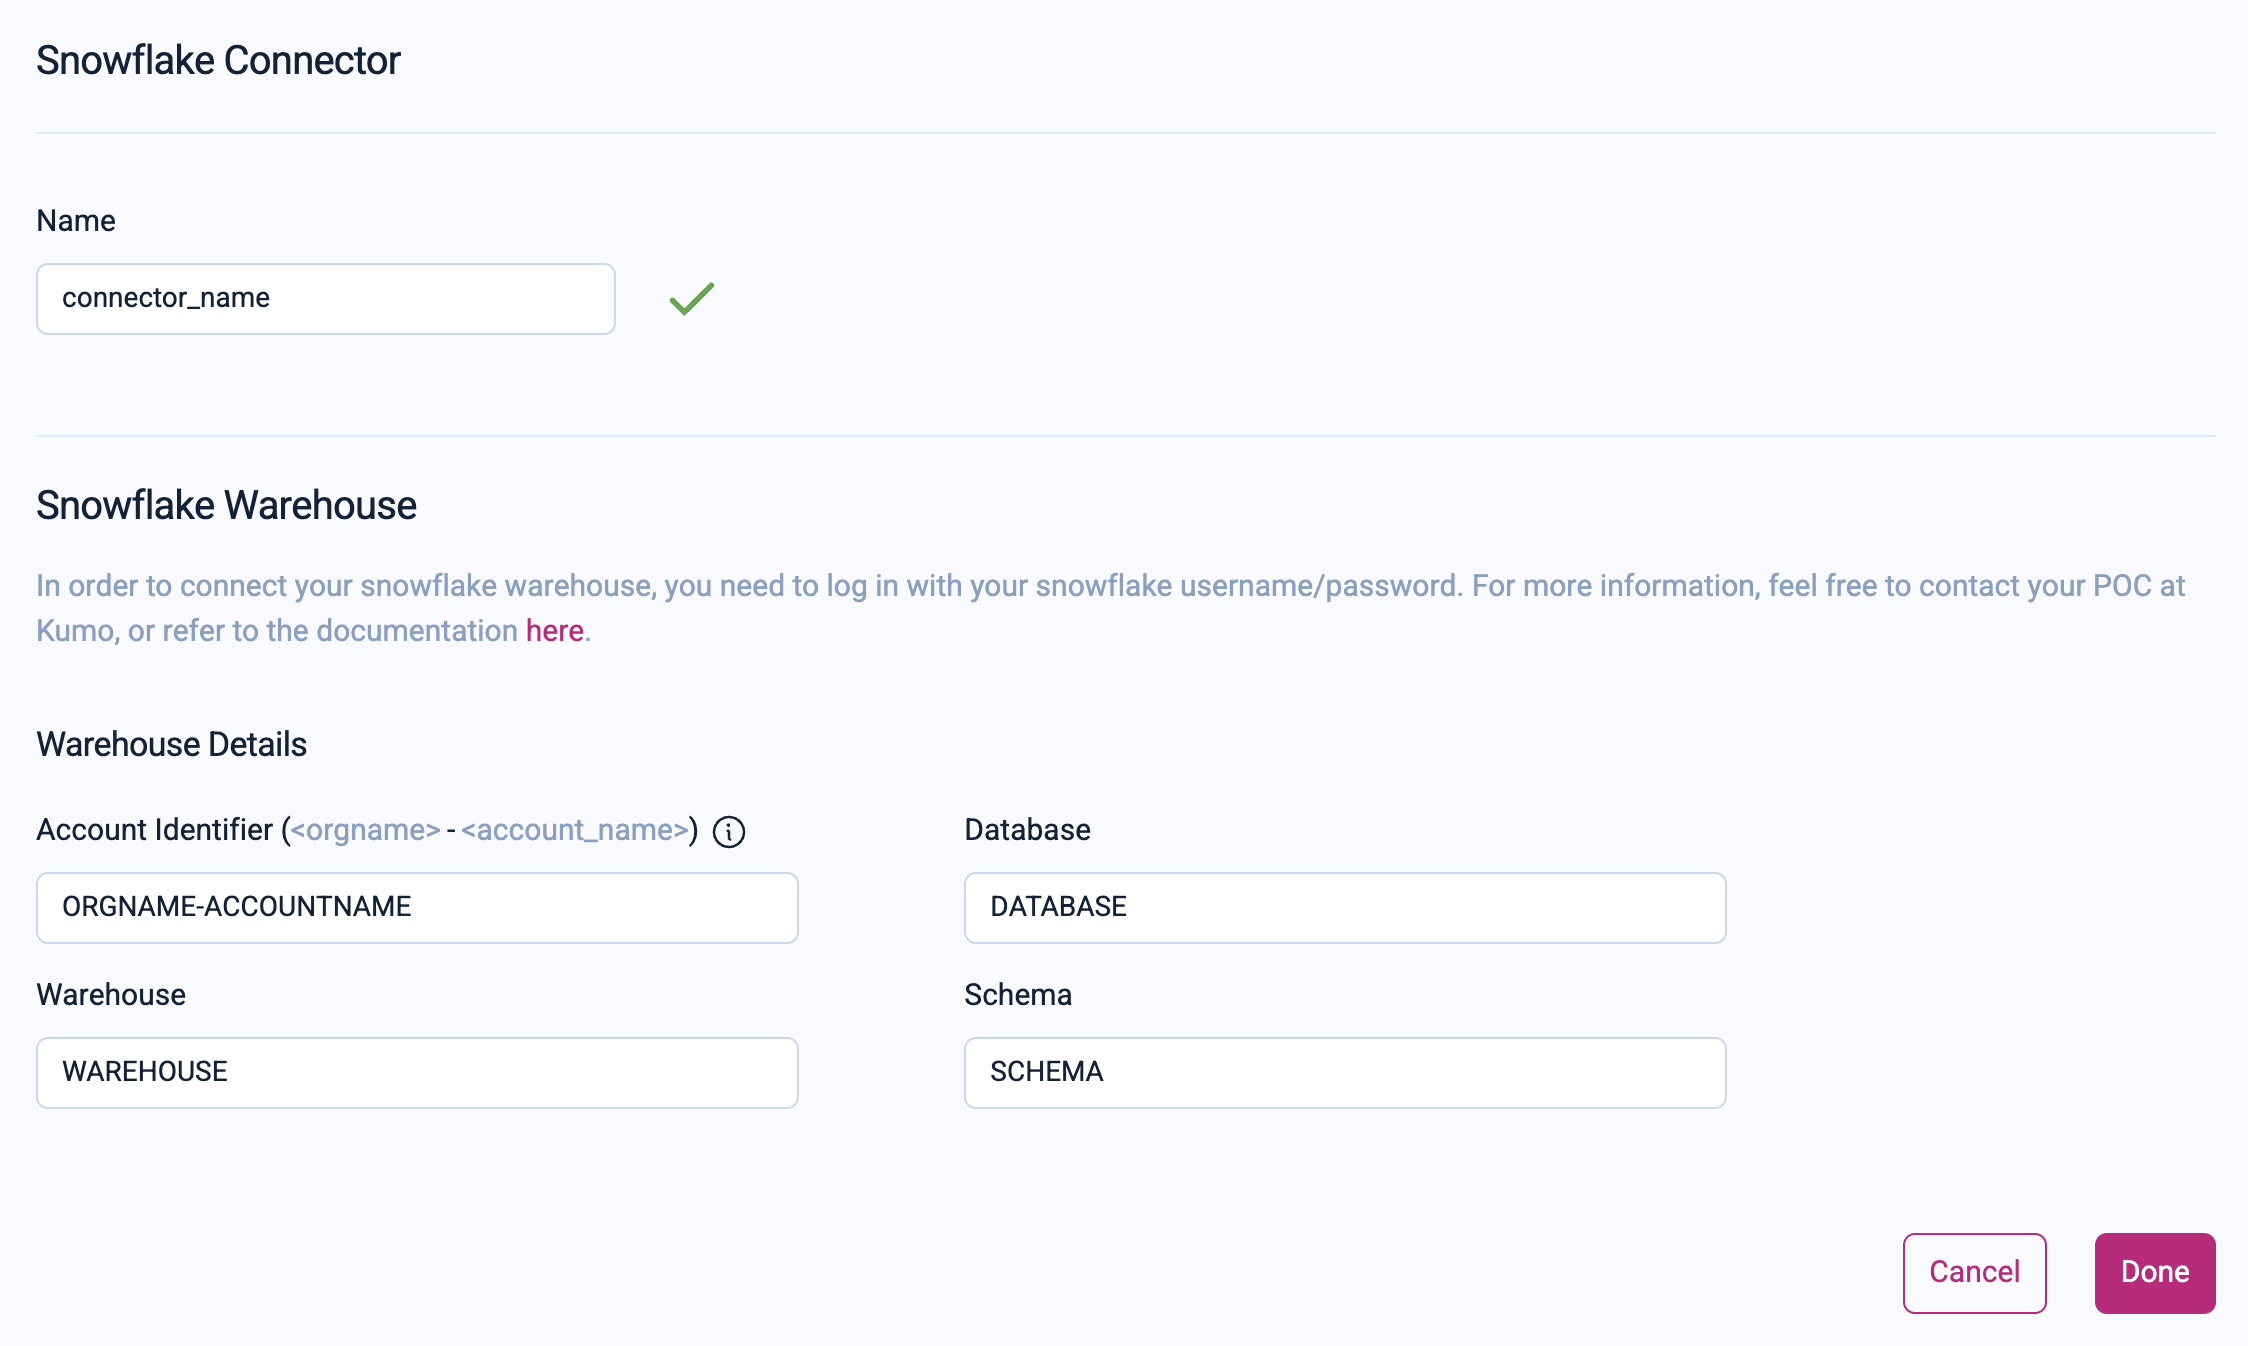
- On the "Snowflake Connector" window, provide a name for your Snowflake connector and add the following connection details. The necessary privileges (described above) must be are granted to the Kumo application before this step.
- Account Identifier - The account identifier uniquely identifies your Snowflake account. This should be provided as
ORGNAME-ACCOUNT_NAME. TheORGNAMEandACCOUNT_NAMEcan be retrieved for your Snowflake account using the instructions here. - Database - The Snowflake database where the input relational data exists (same as the one in Step 1).
- Warehouse - The warehouse that will be used to read and process data in Snowflake (same as the one in Step 1).
- Schema Name - The schema under the Database where the input tables are to be loaded from (same as the one from Step 1 but should not be prefixed with the Database name).
Click on the Done button to save your new Snowflake connector.

Snowflake Data Warehouse Sizing
Kumo recommends the following data warehousing sizes for the Snowflake Native app based on the size of your largest table.
| Largest Table Size | Snowflake warehouse Size |
|---|---|
| Up to 10 GB (10s of millions of rows) | Medium |
| 10 to 100 GB (100s of millions of rows) | Large |
| Greater than 100GB | Currently not supported in Kumo's Snowflake Native app. |
Updated 2 months ago
