Connector Source Type
If you select "Connector" as your source type, Kumo will automatically load the "Connector" drop-down menu with a list of available connectors.
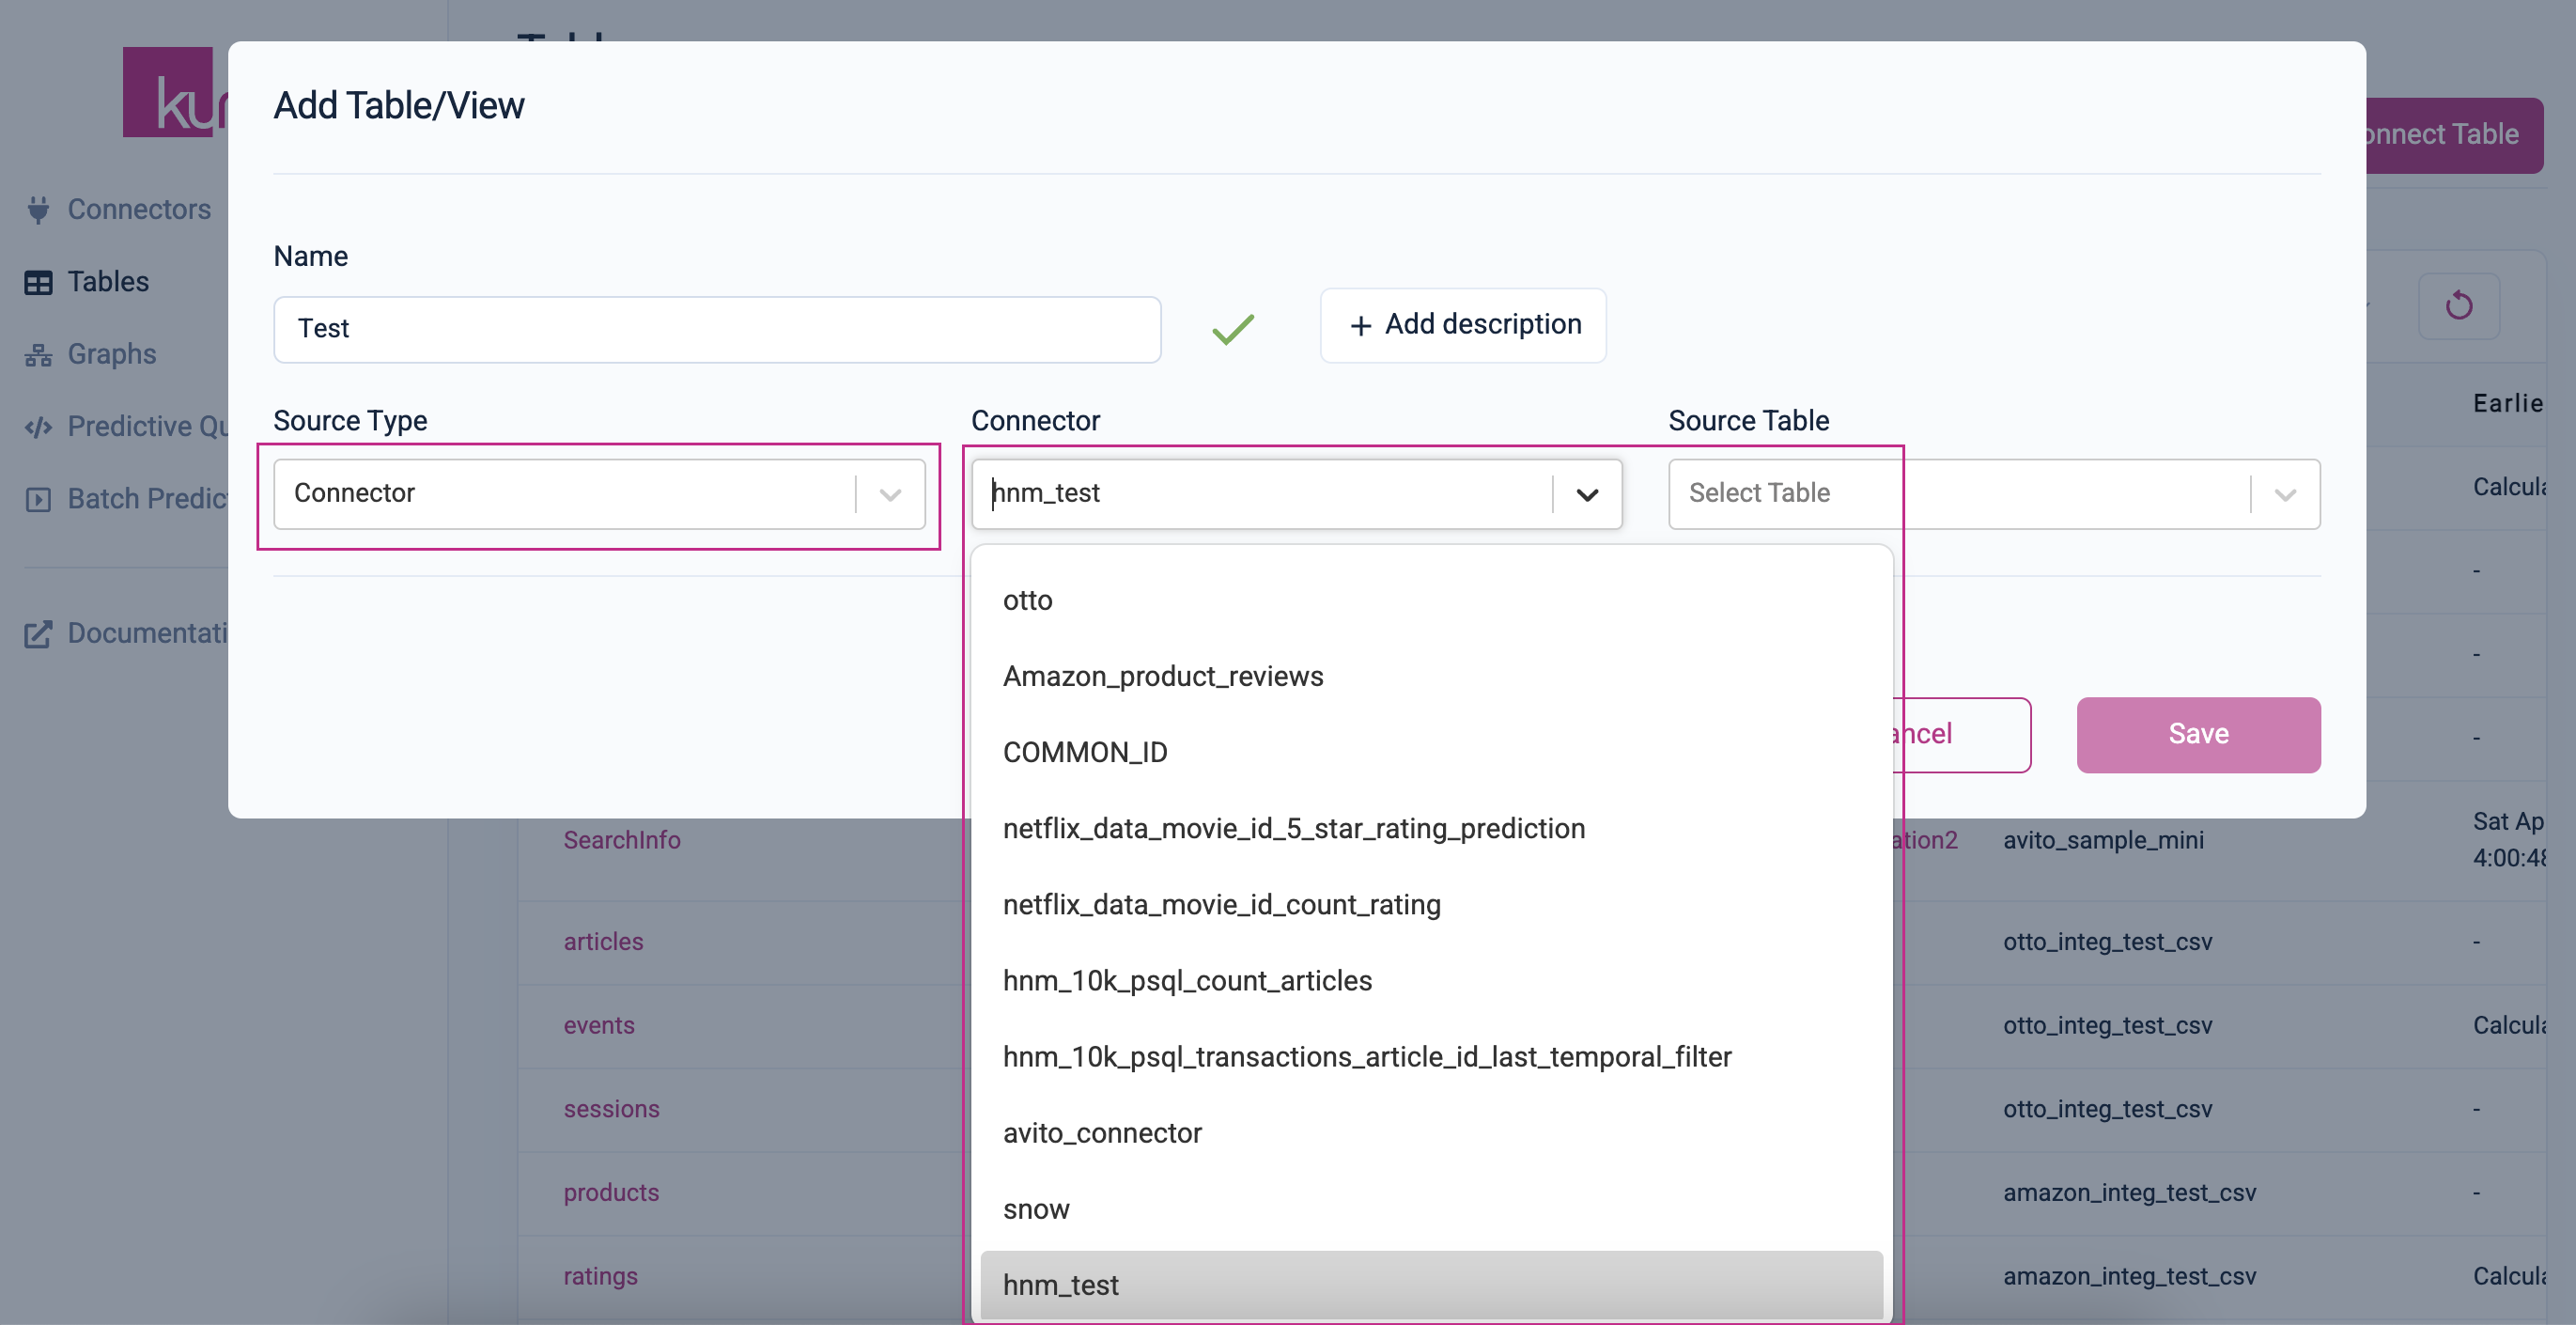
Selecting a connector from the "Connector" drop-down menu will automatically load a list of available tables in the "Source Table" drop-down menu.
Note: If you are using Native Databricks Application, after selecting a connector from the drop-down, you have to enter the schema name to have the Source Table list load available tables.
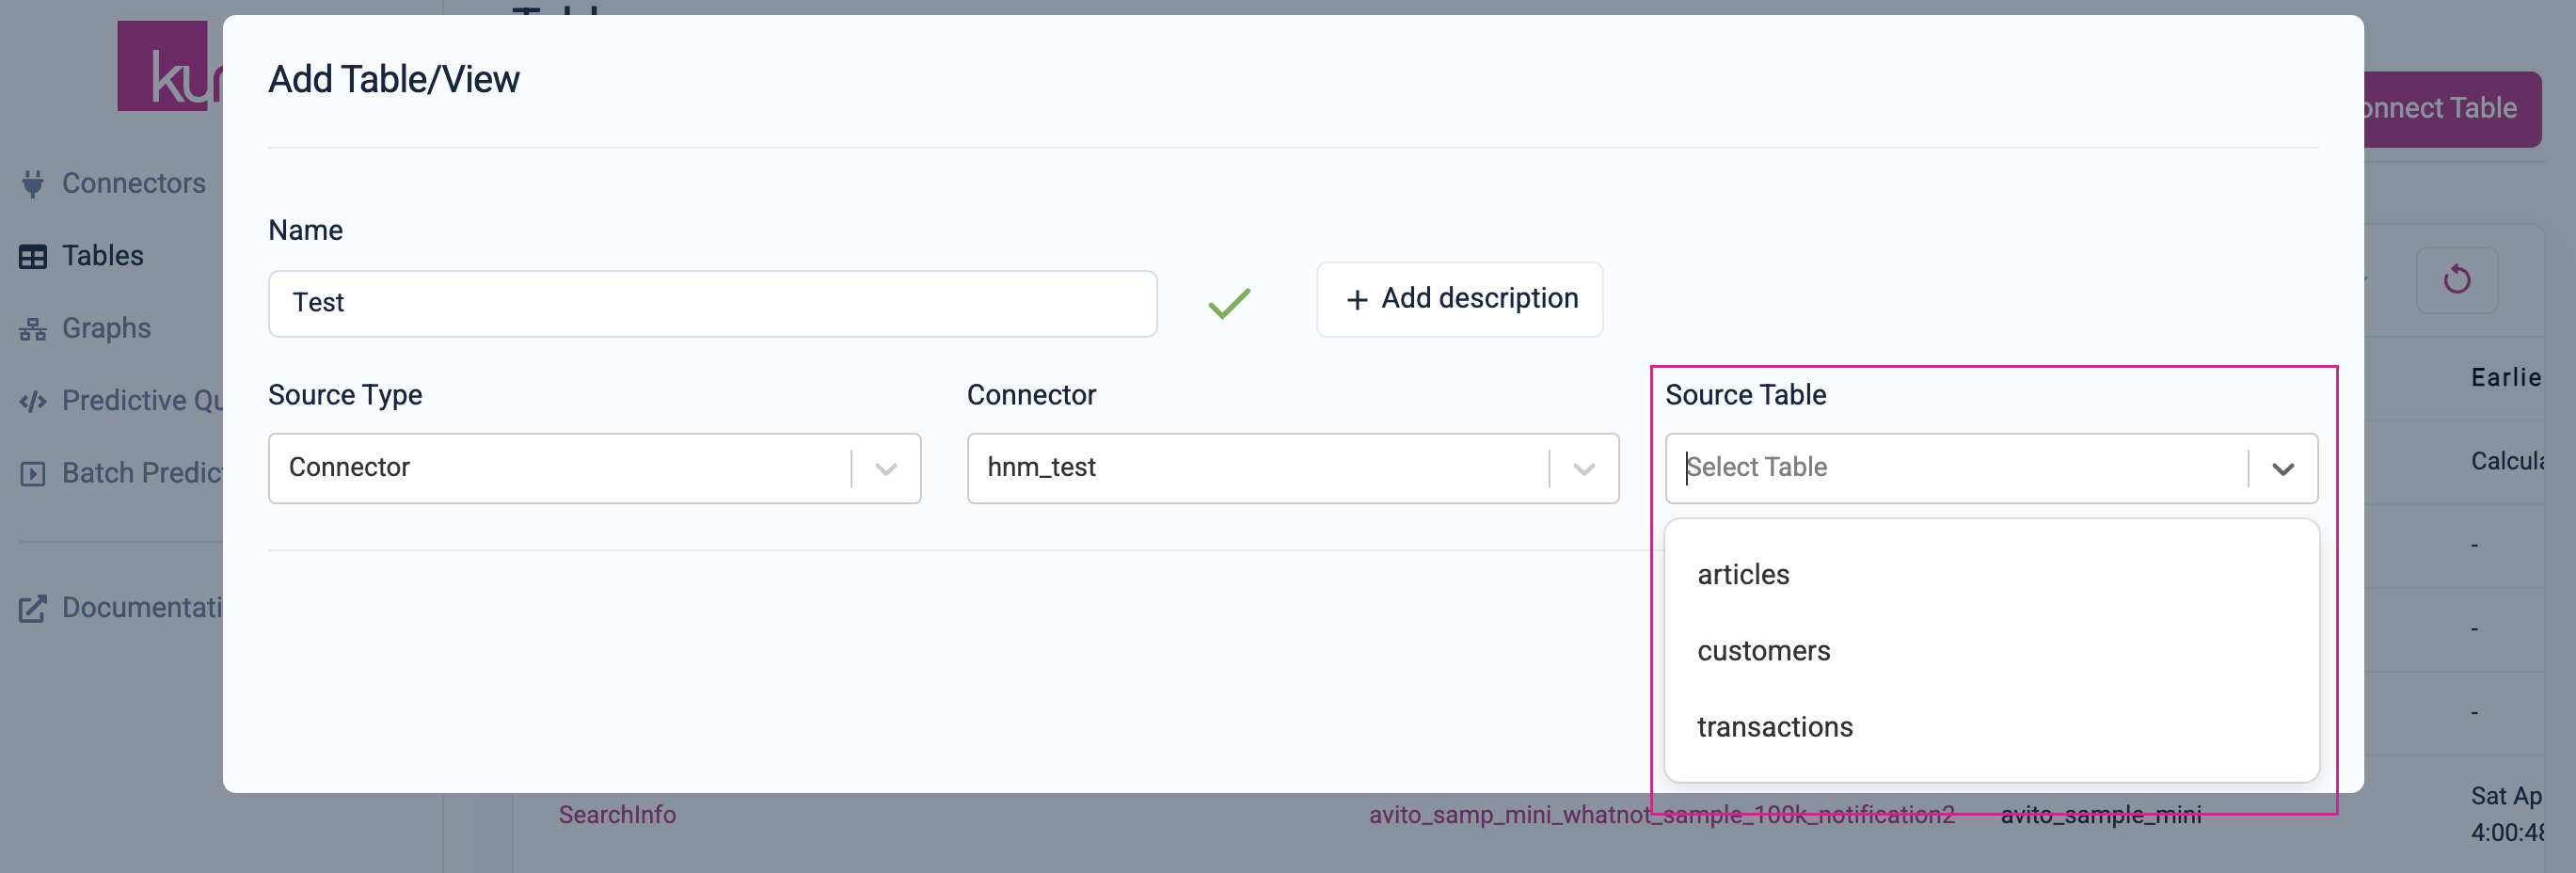
Table Settings and Column Selection
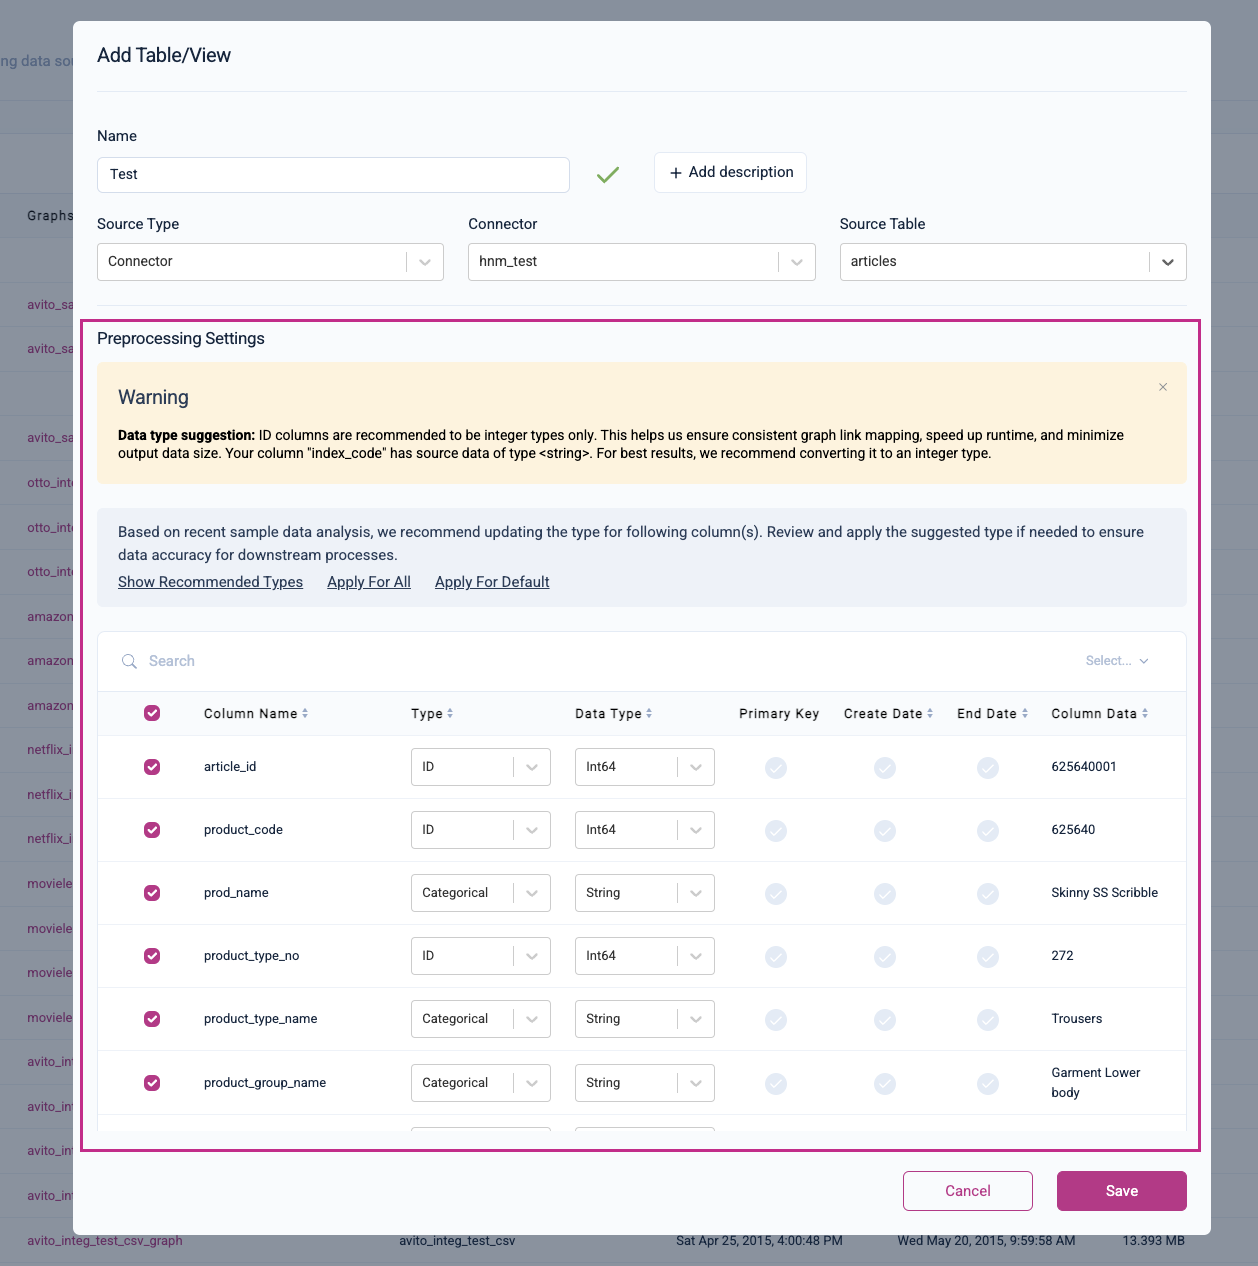
Once you select a table from the "Source Table" drop-down menu, Kumo will allow you to select which columns to ingest (all columns are selected by default), as well as the relevant preprocessing settings.
Please refer to the "Column Selection" page for more guidance regarding which columns to select for ingestion.
Column Preprocessing
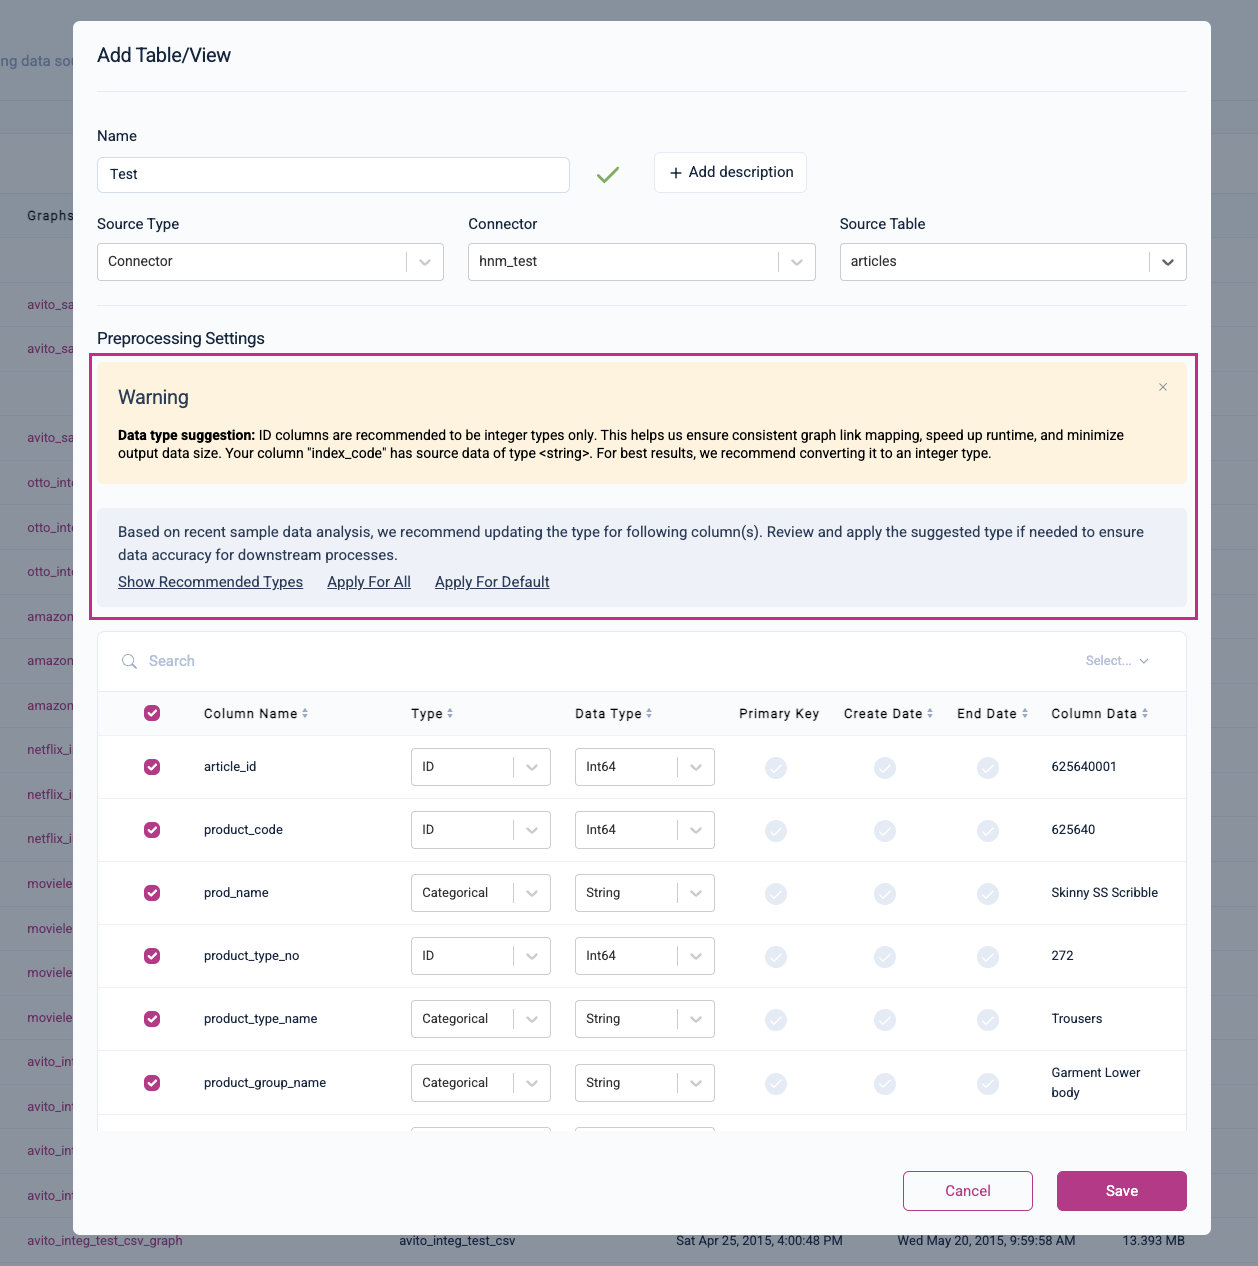
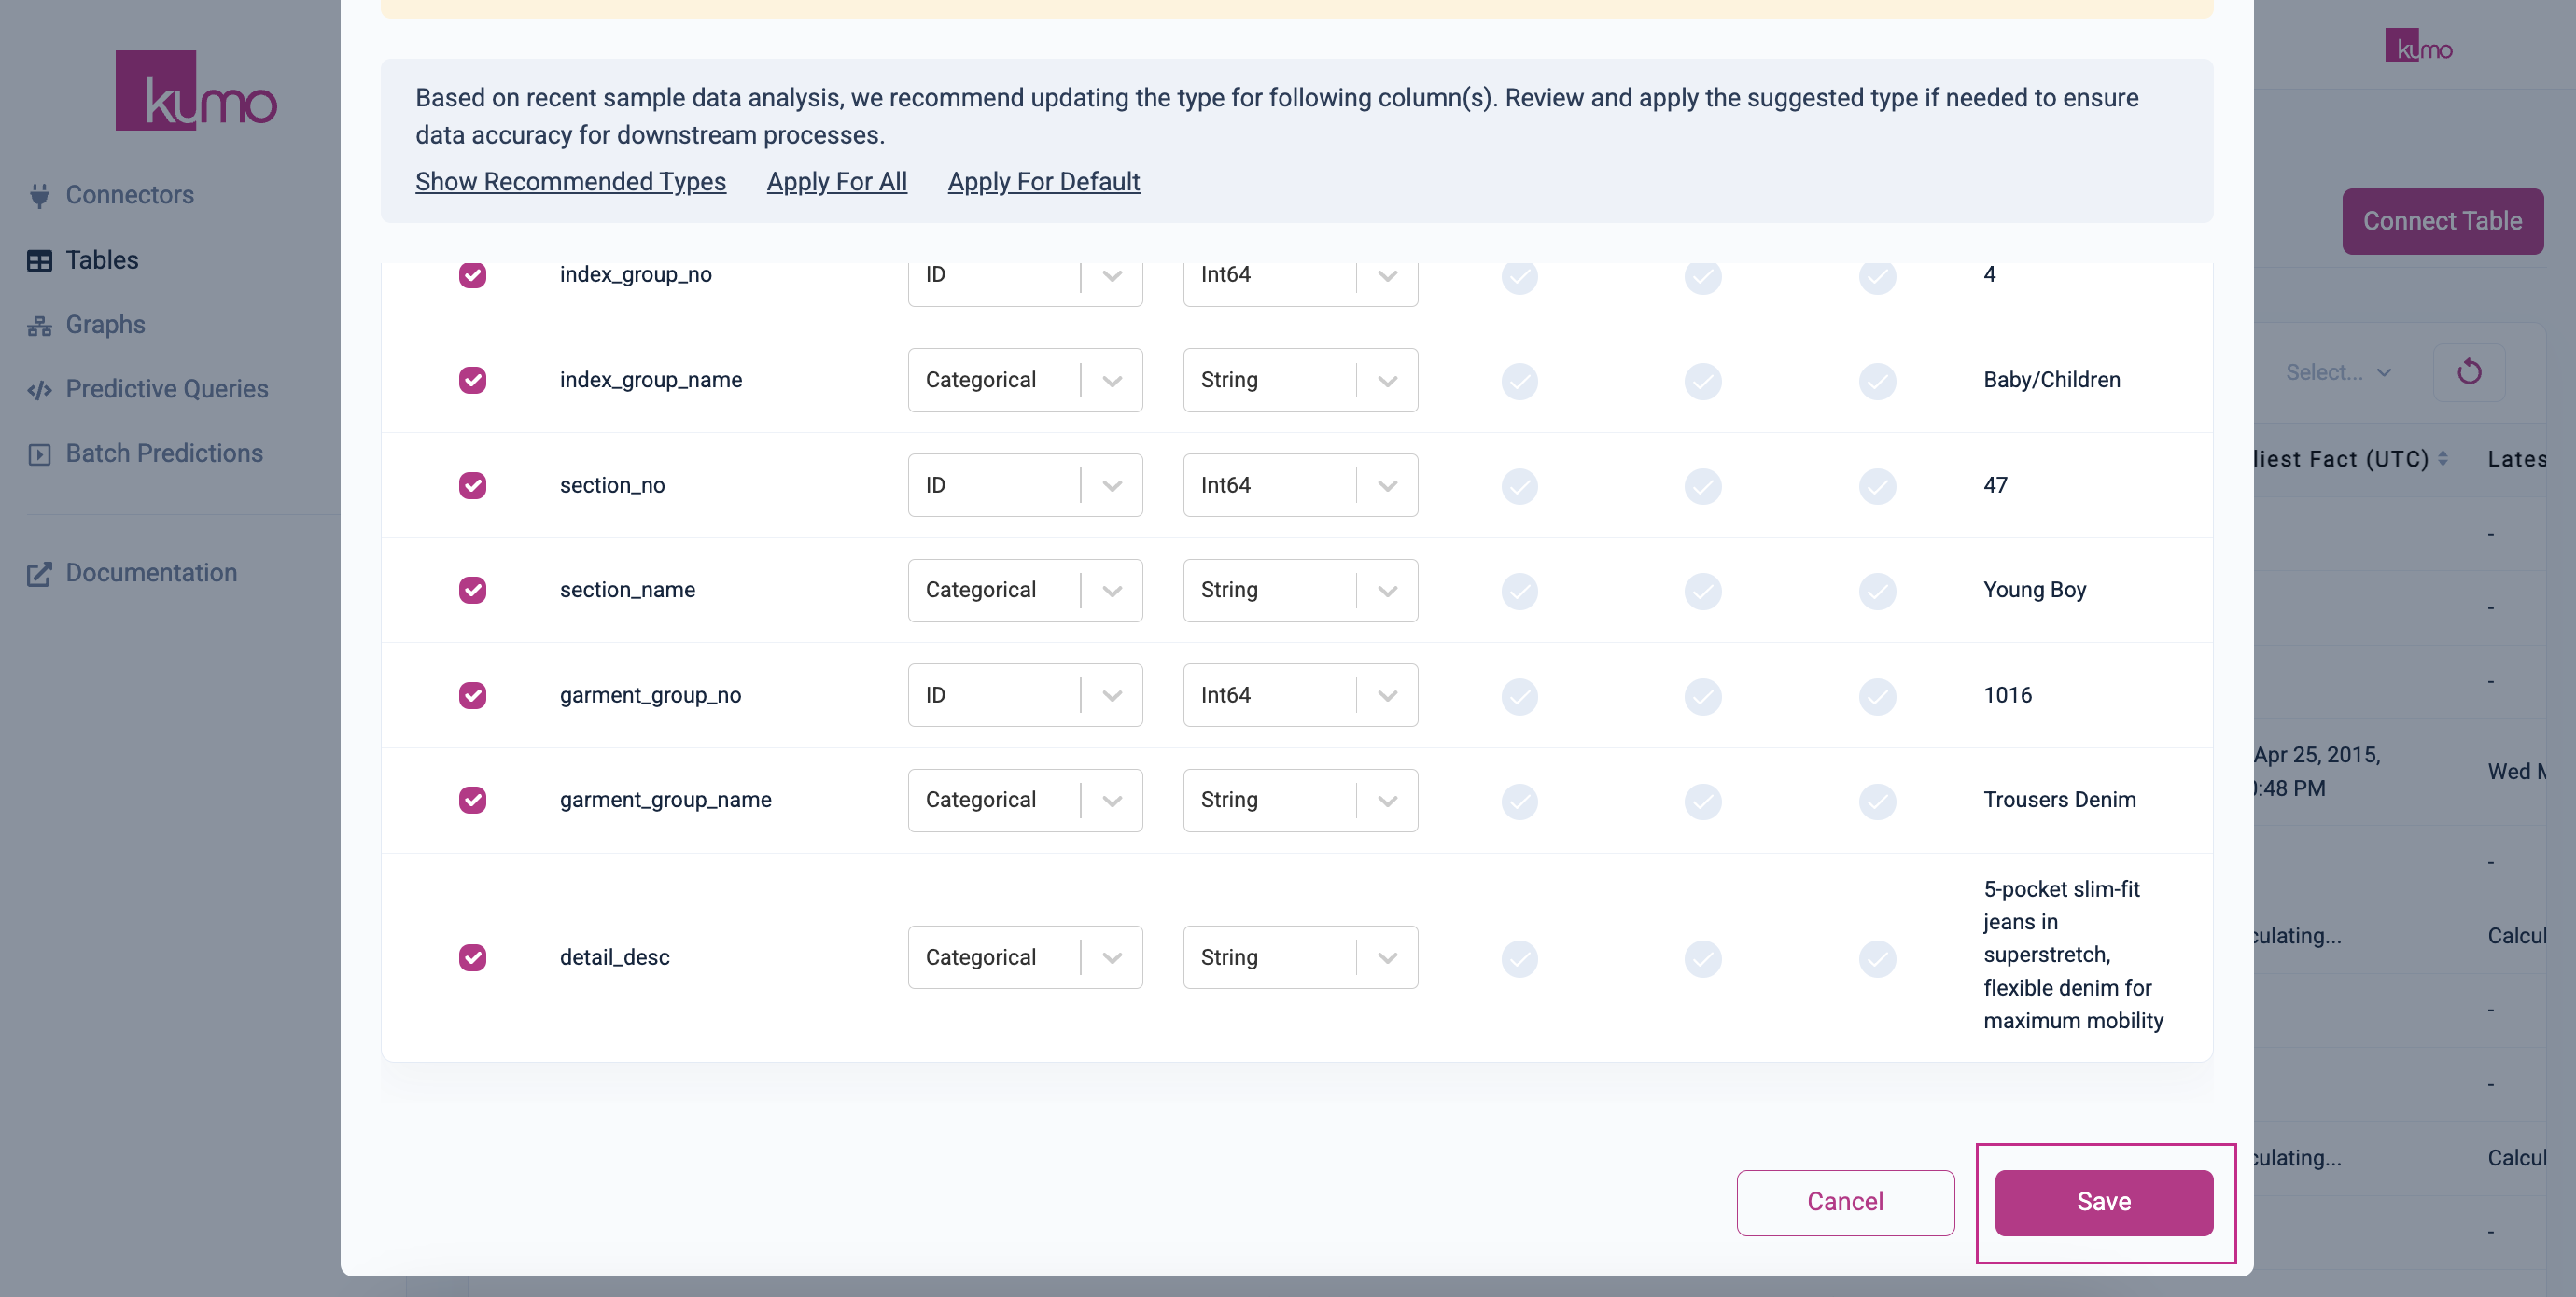
Kumo will auto-detect your column types for pre-processing; however, you can also set the column types manually here. Kumo will alert you of any recommended column type updates or data type suggestions.
Please refer to the "Column Preprocessing" page for more information regarding column preprocessing steps.
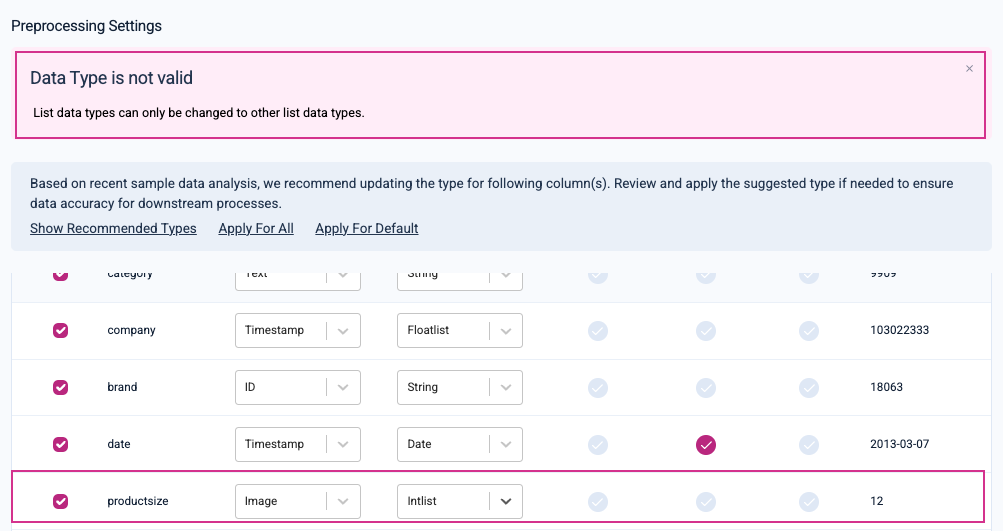
Make sure that your selected semantic data type (i.e., Type) matches your selected data type (i.e., Data Type). If a mismatch is detected, Kumo will alert you with the following invalid data type error:
When your table includes many columns and/or embedding columns, please ensure that the total number of dimensions per row is 4096 or fewer. Contact the Kumo team if you need to increase this limit.
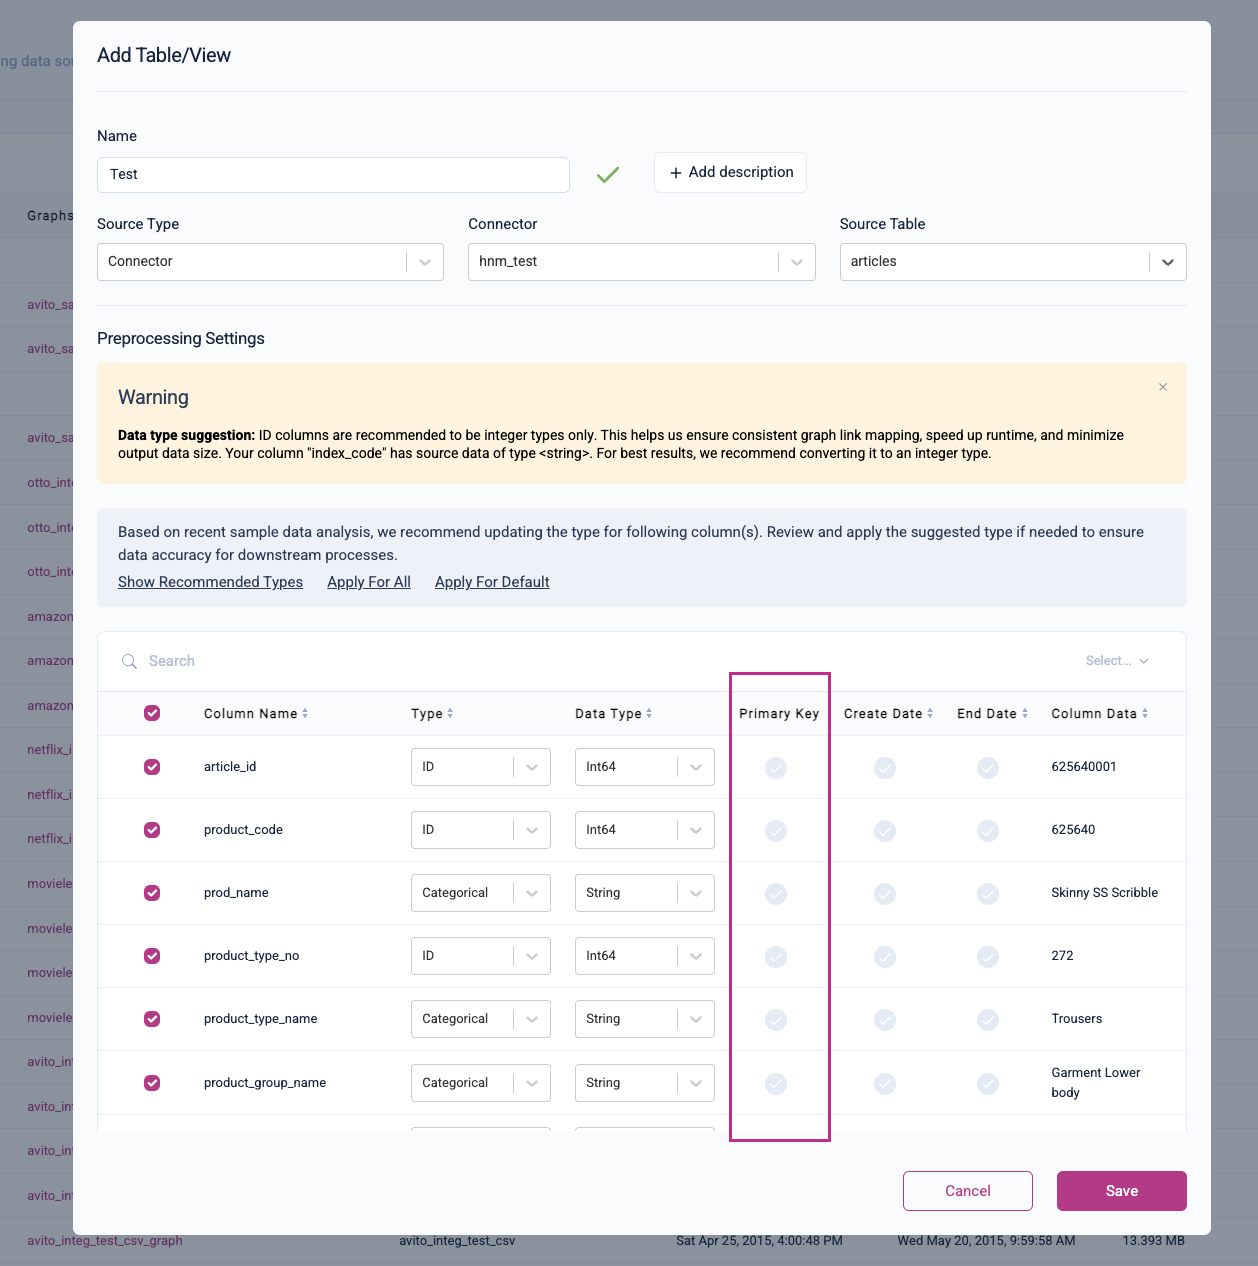
Select A Primary Key Column
Each row should have a primary key consisting of a unique value (e.g., user ID). If multiple rows have the same primary key value, only one of the rows will be chosen and the rest will be dropped.
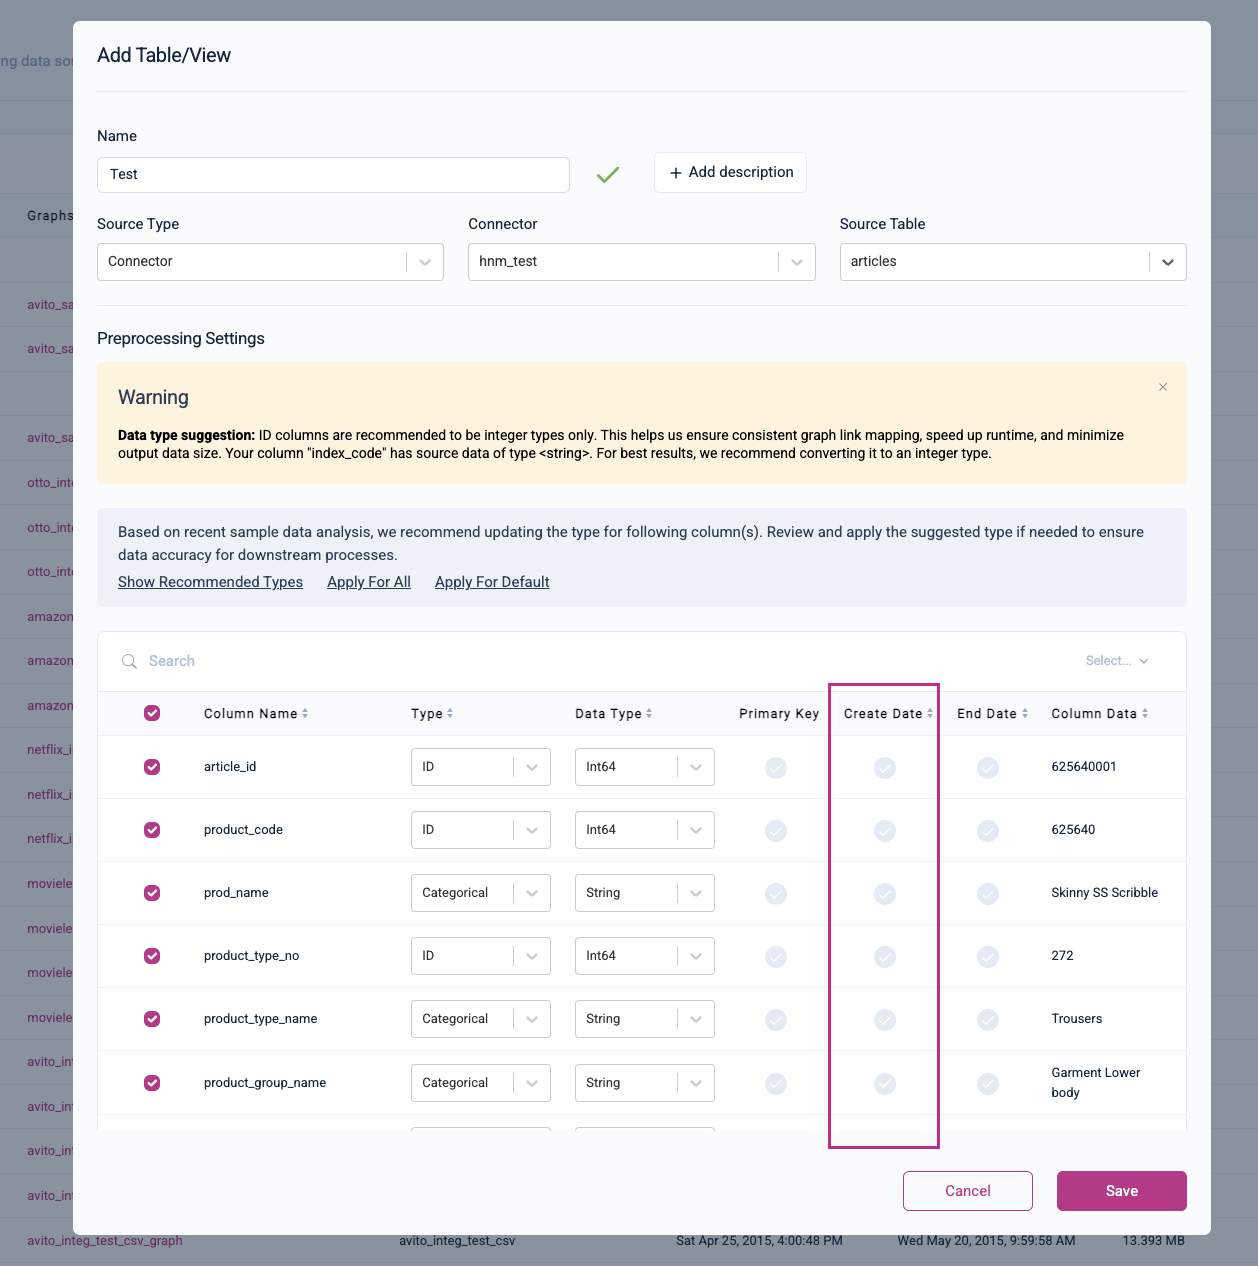
Select A Create Date Column
You can specify whether or not your table contains a create date column (i.e., the column with each row's creation timestamp). This columns represents the row's creation date or the date that the information in the row becomes known and true.
Select An End Date Column
You can also set an end date column to restrict your training and batch predictions to a specific timeframe. Setting an end date for a temporal task will only train on entities that are valid for that timeframe. Batch predictions will only include entities with a create date on or before the prediction time and an end date before the prediction time.
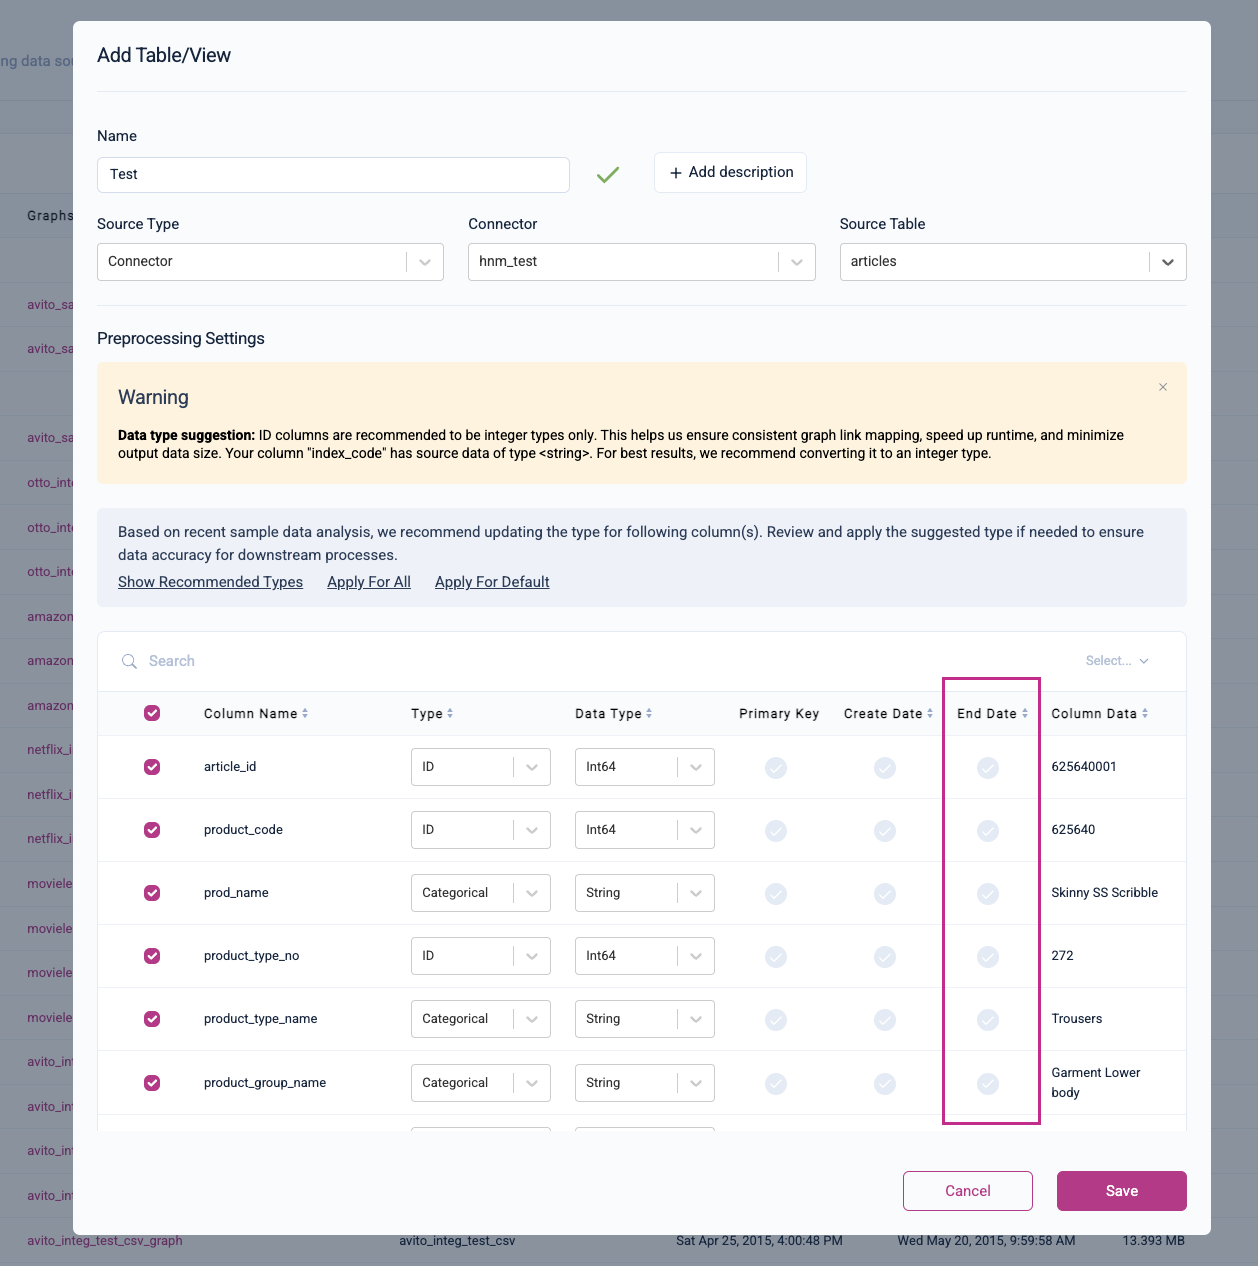
For example, if you have a table of products, and the product went out of stock on a particular date, you can set end_date to the column that represents the date that the product went out of stock
Save and Review Your Table
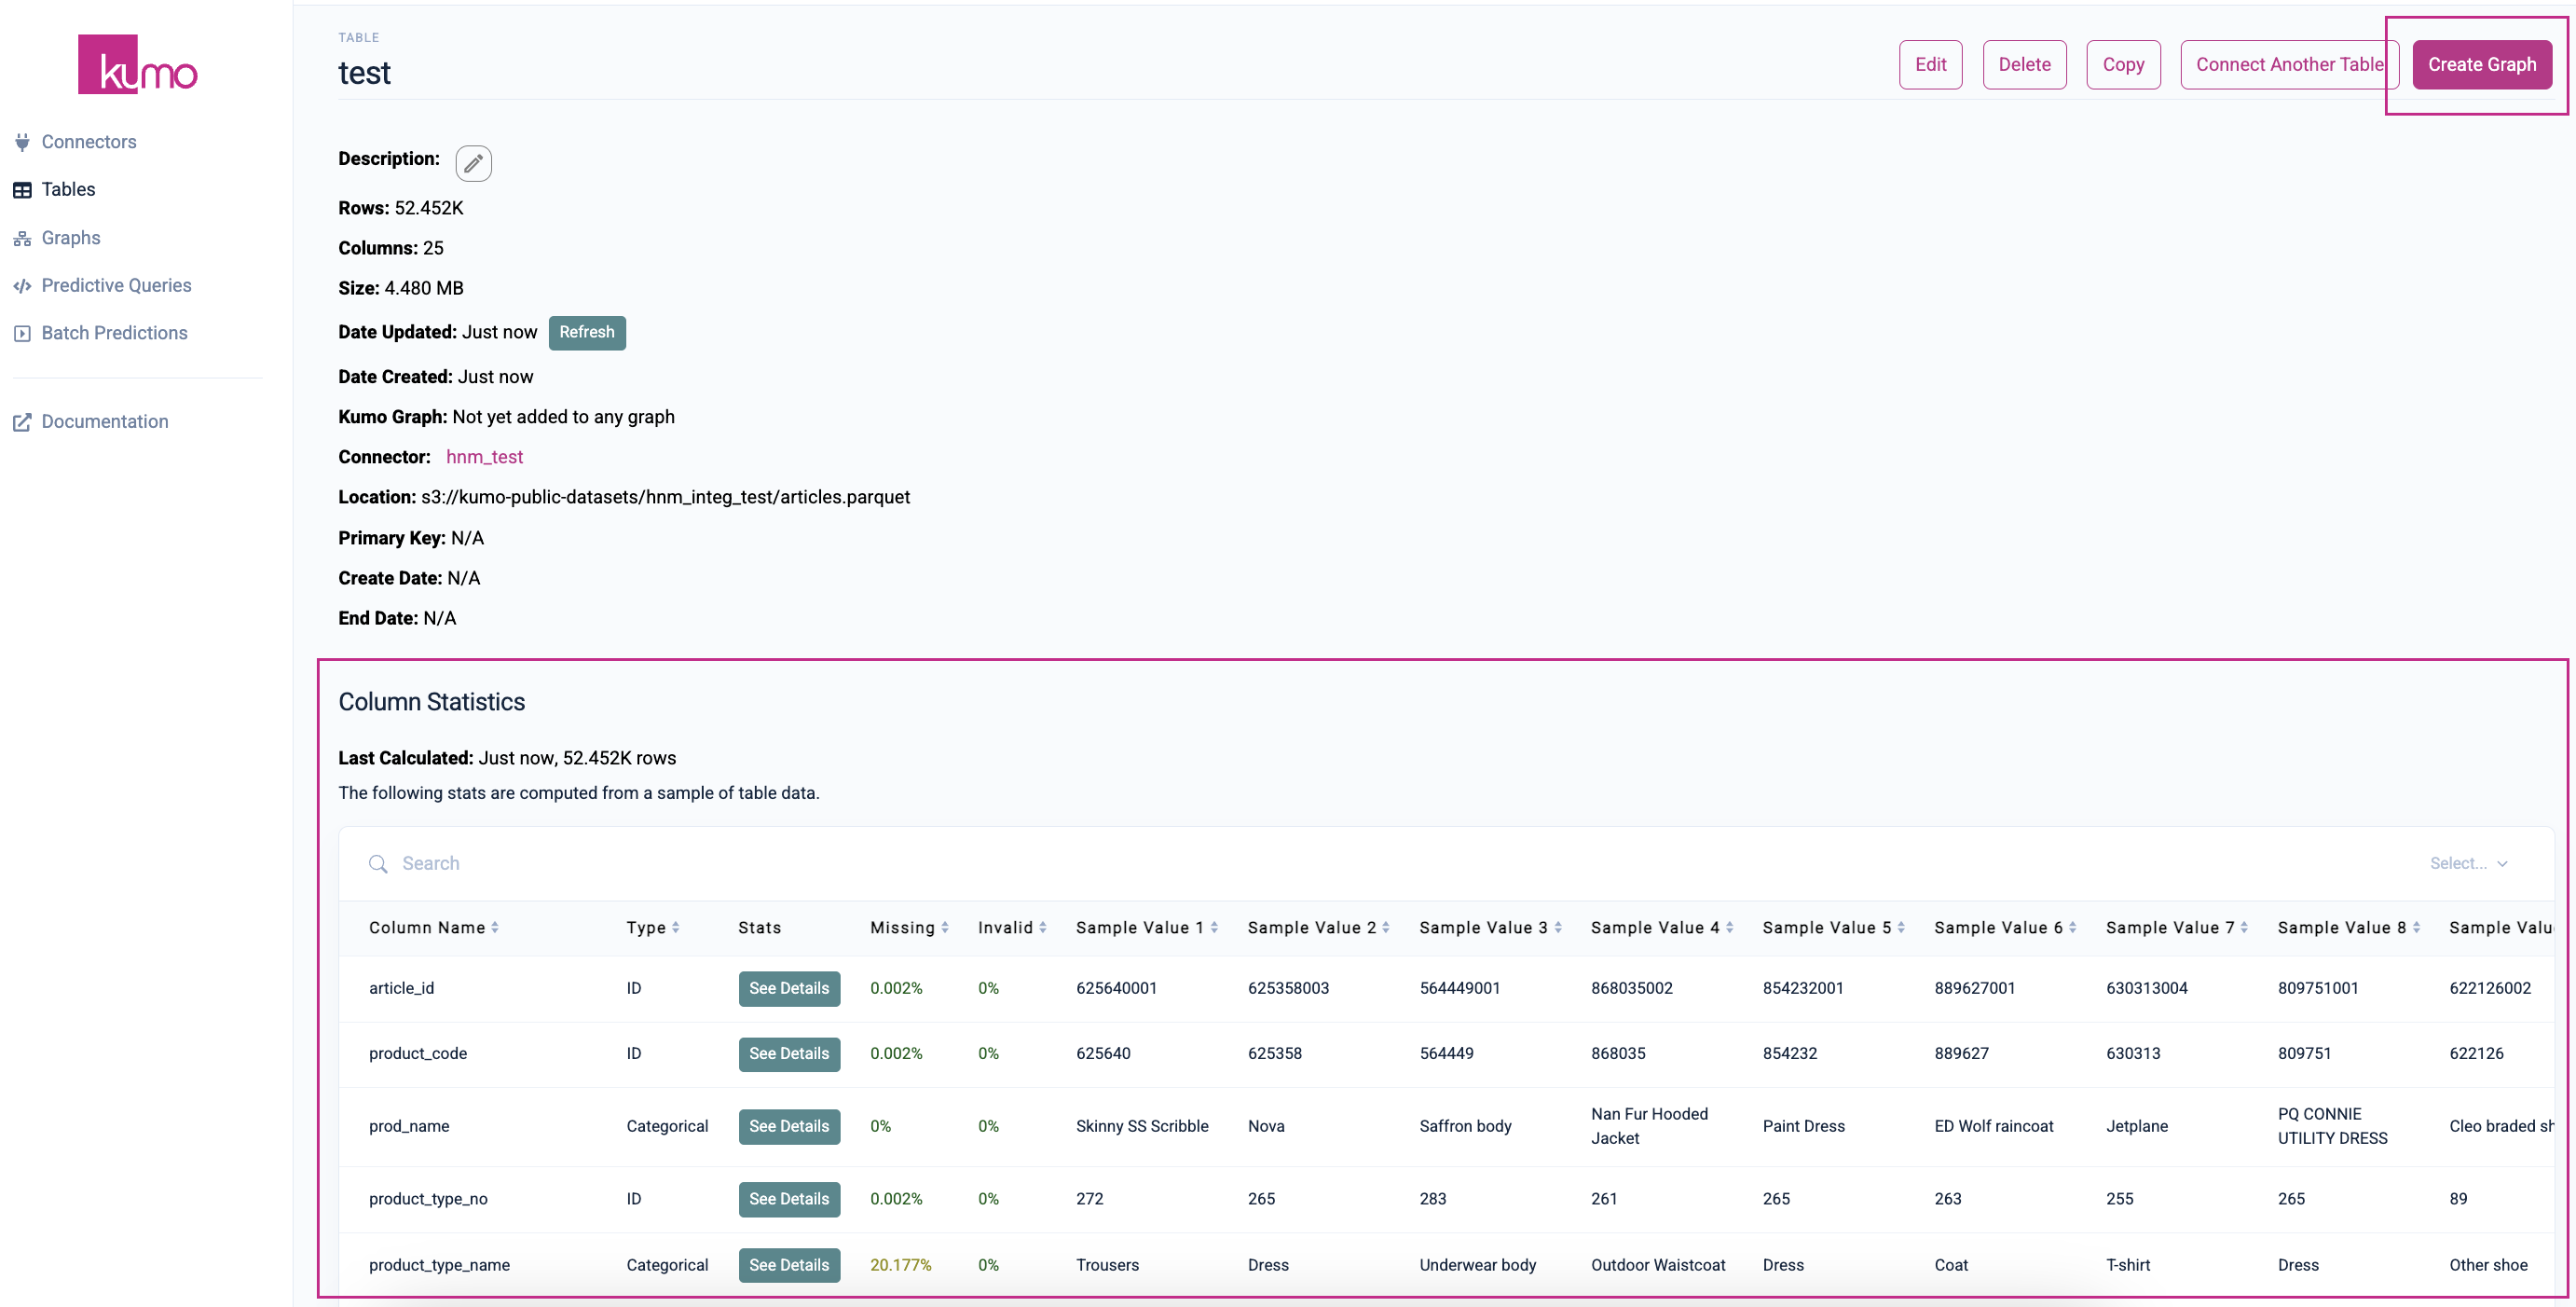
Click on the Save button to save your new table. Kumo will route you to the new table's summary page where you can view/verify the table creation results and column statistics.
Click the Create Graph button to continue on to the graph creation process.
Reviewing Table Details
You should analyze your tables' details, column schemas, and other metadata that Kumo provides for debugging purposes. This debugging data is helpful for determining if the connected table is the one you actually want to connect to, and whether its suitable for predictive ML purposes—it may require additional fixes or curation efforts.
This can be done at any time, but it's especially crucial immediately after creating a new table.
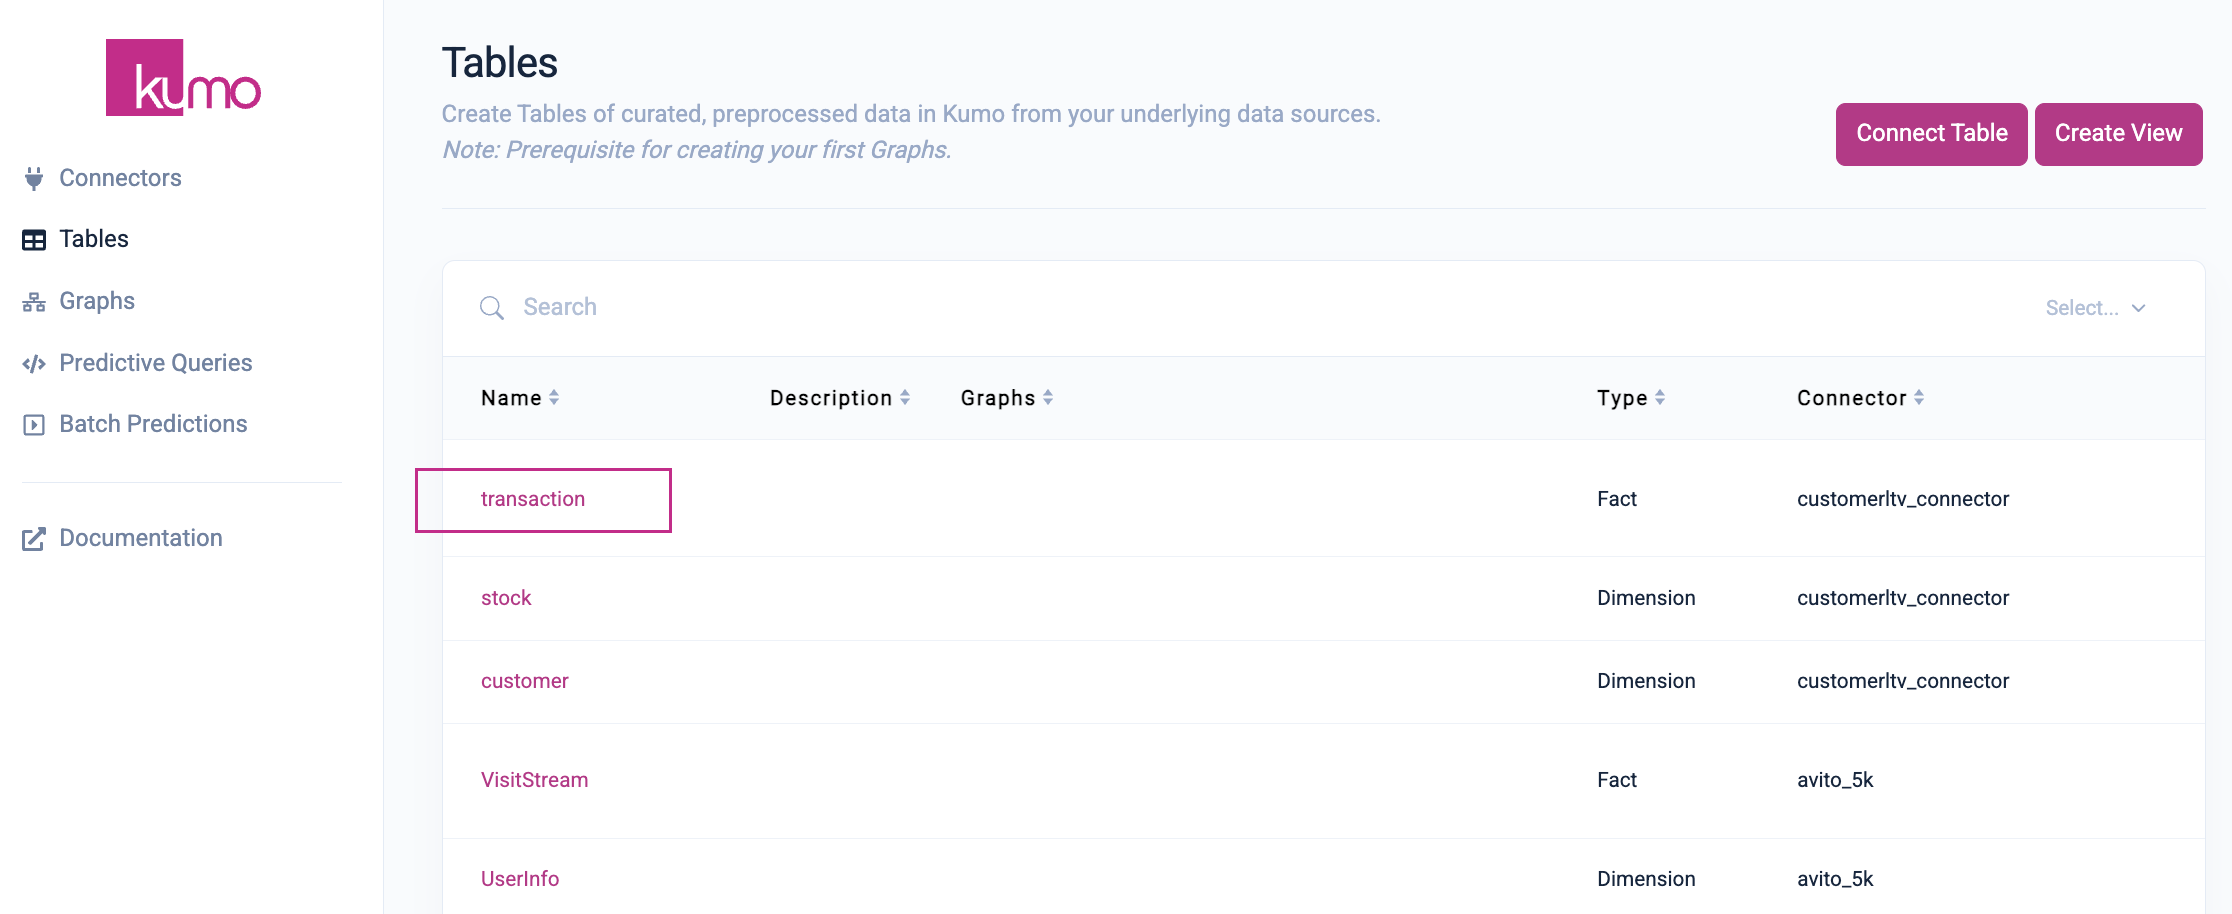
From the "Tables" page, click on the table you would like to analyze (e.g., the transaction table in the following example).
On the table detail page, click the See Details button in the "Stats" column to view additional debugging data.
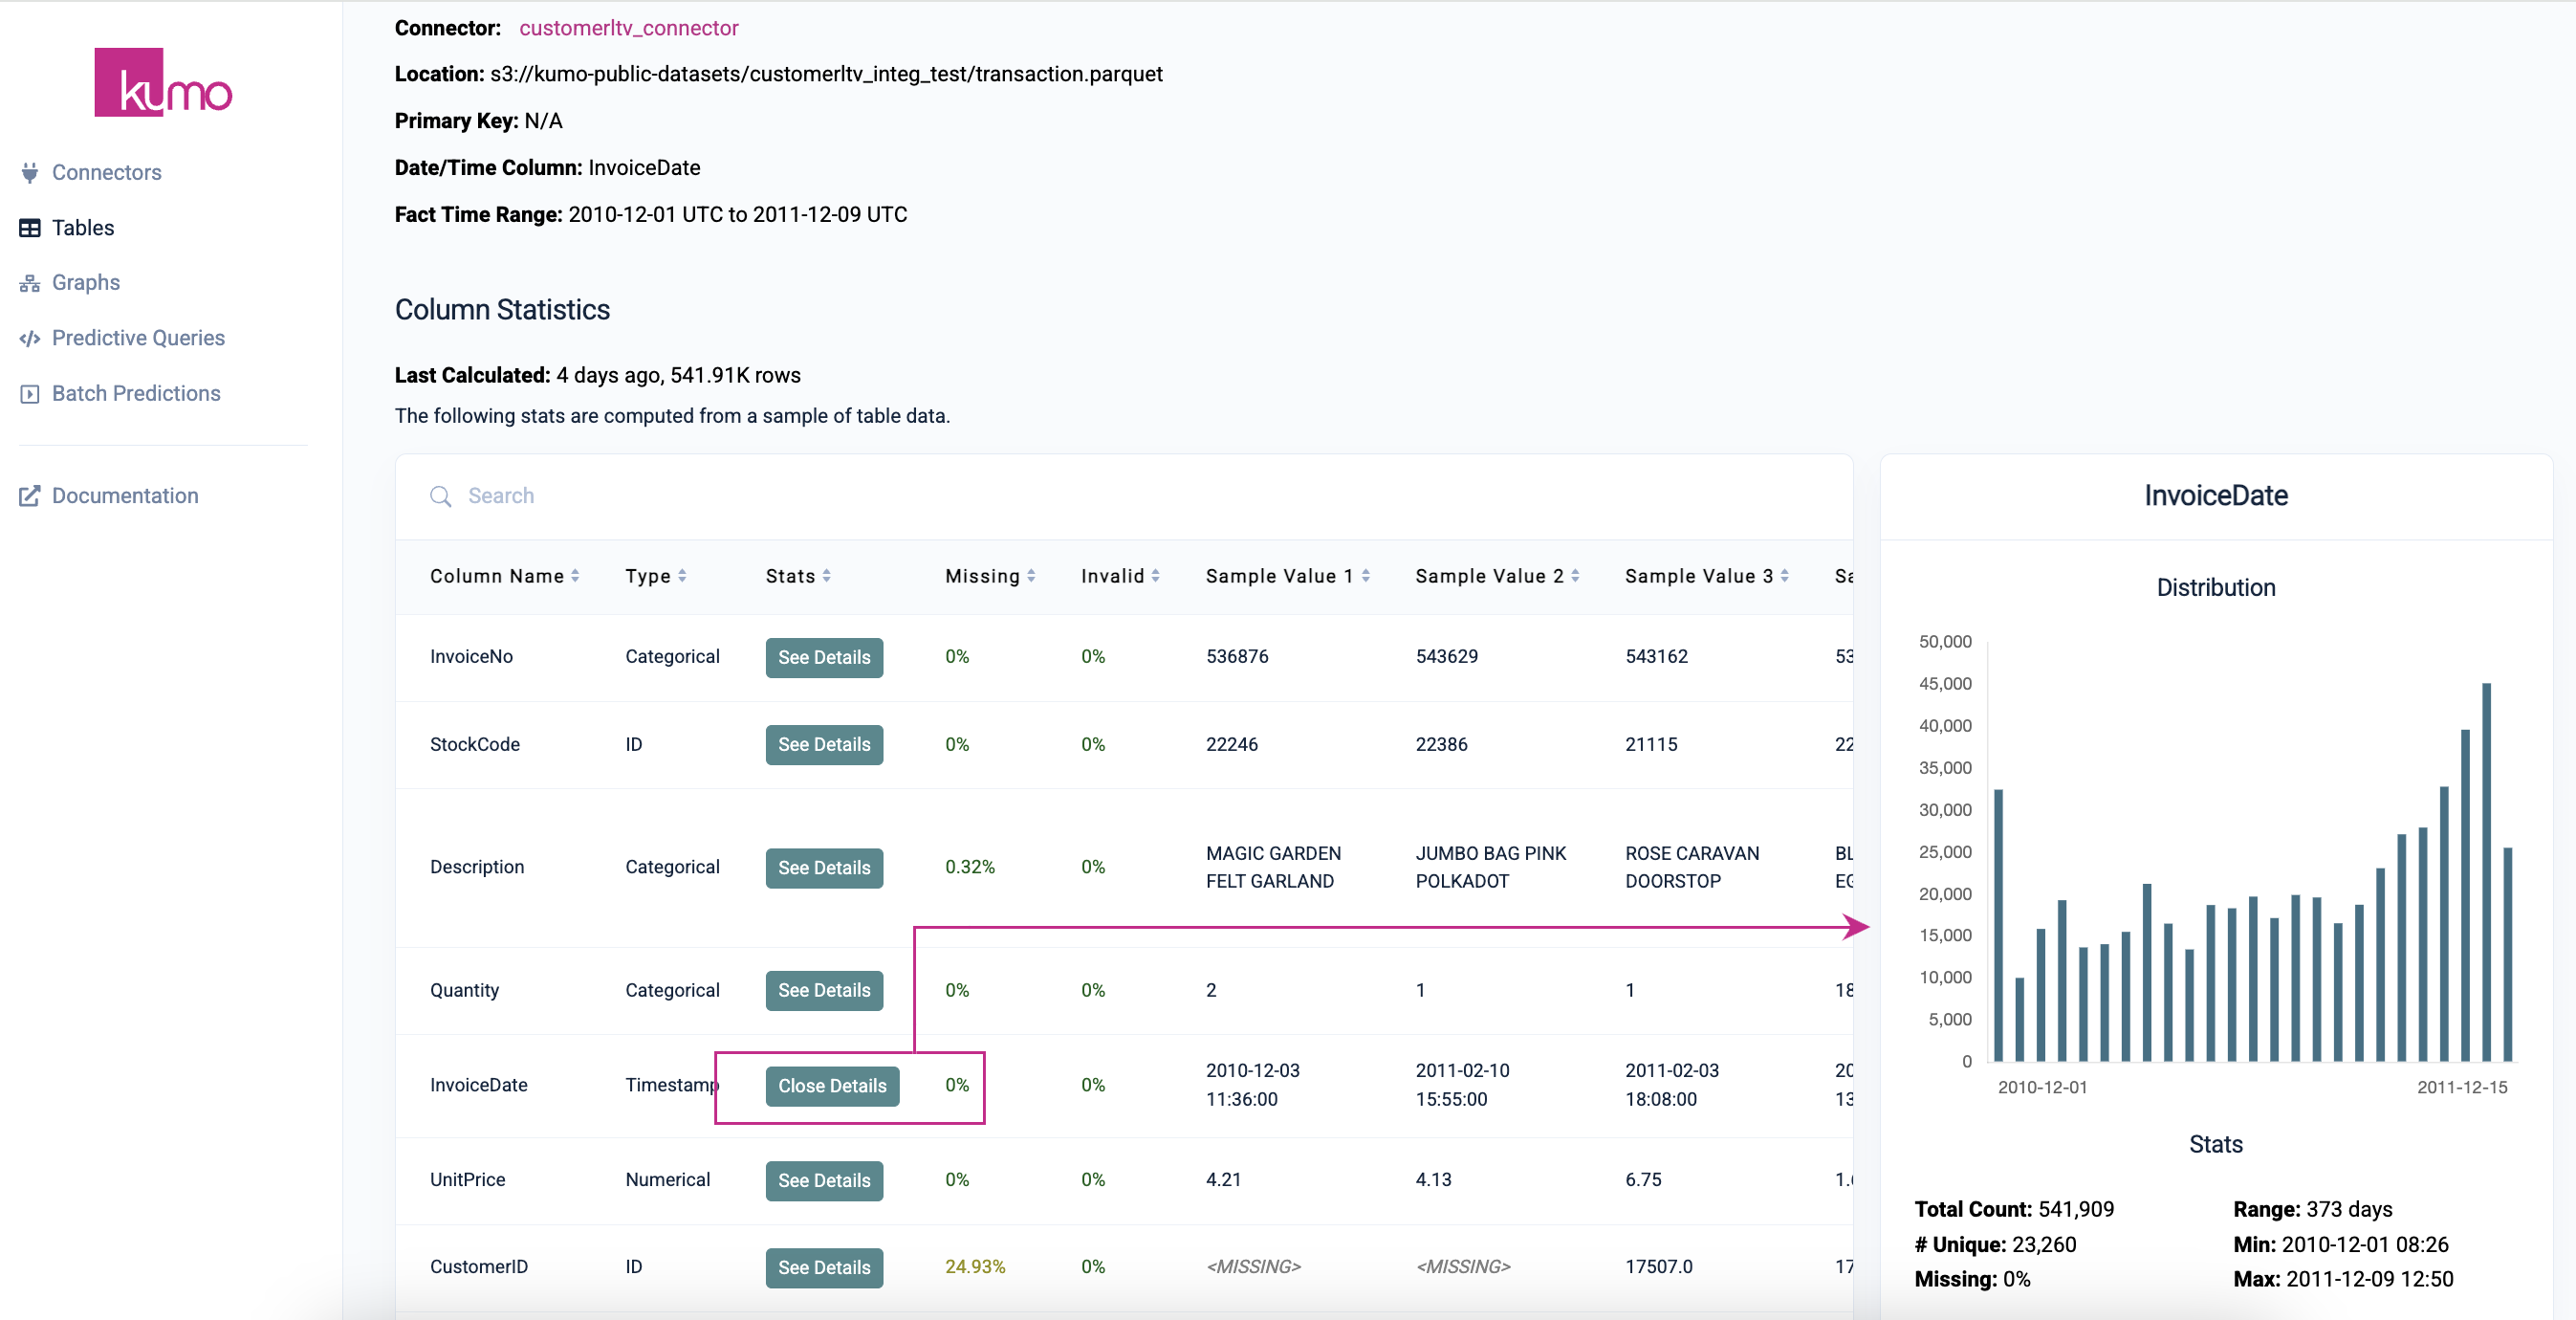
Useful debugging data may include:
- Statistics for each column (e.g., % missing values, cardinality, distribution plots, etc.)
- Example rows
High-quality data is crucial for ensuring downstream prediction accuracy. Click here to learn how to improve data quality.
Missing Data
Kumo identifies missing values as entries that are completely left blank, and will not treat columns marked by special strings (e.g., "NaN", "none", "N/A") as missing values. For numeric columns, missing values are commonly filled with invalid number (e.g., -1) to signify their absence. These entries should be cleared out or left blank if you would like them to be considered as missing data.
Updated 8 months ago